Loved by 100+ creators
Do everything with one platform.
🔗 Short links 📱 Bio pages 🤳 QR codes 👤 Share Vcards 📃 Transfer files 🧑💻 Host HTML Sites

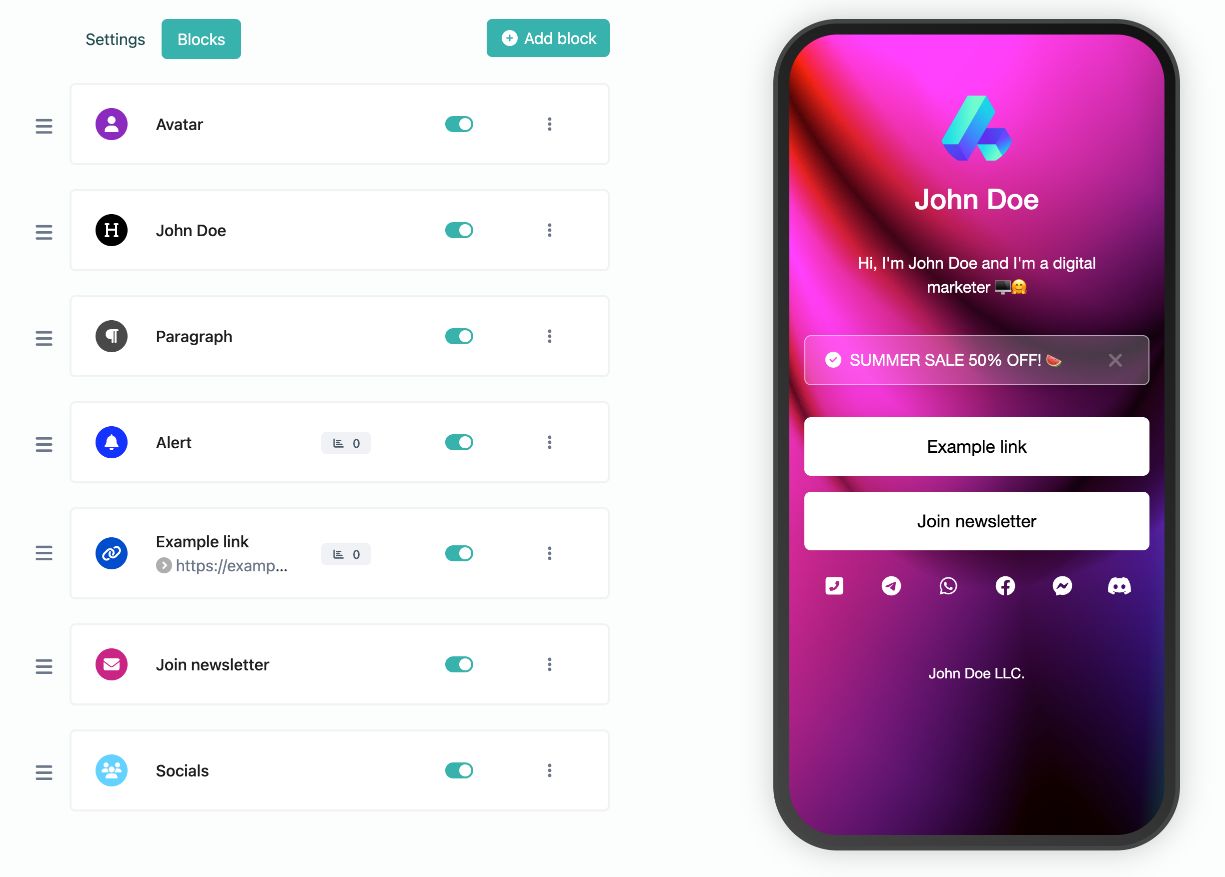
Bio link pages
Create your own unique & highly customizable bio link page with ease.
-
Custom colors & branding
-
Tons of ready-to-use components
-
SEO settings
-
Password protection, sensitive content warning
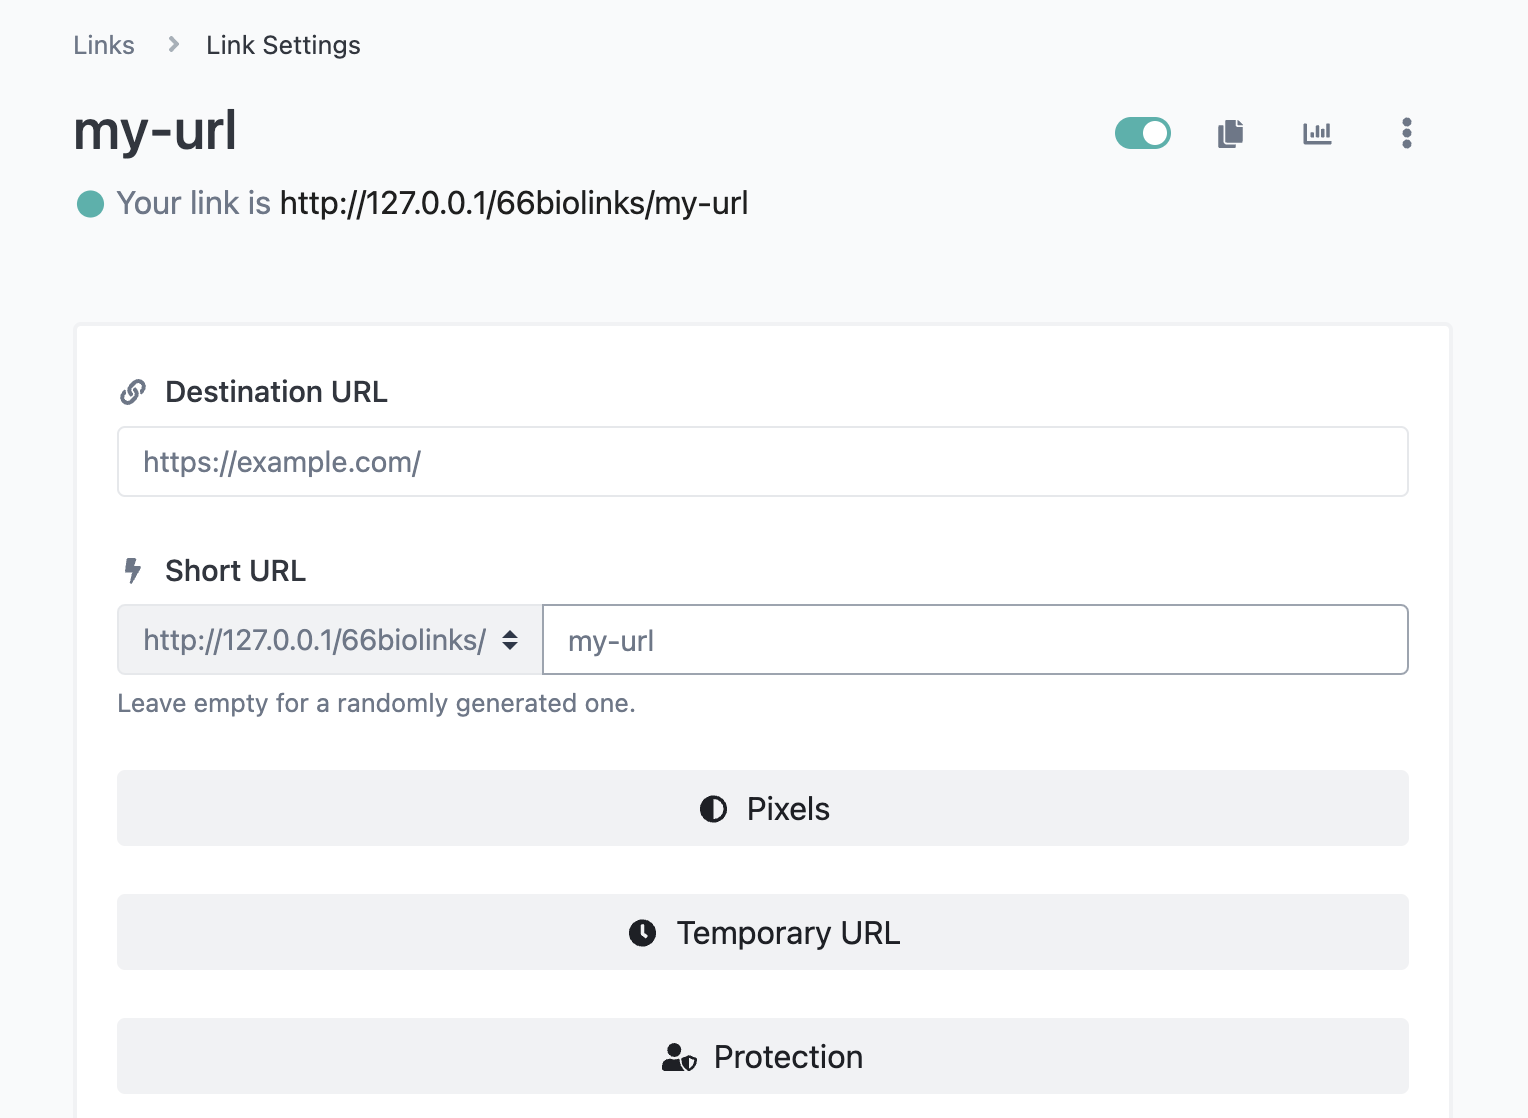
Shortened links
Yes! You can use our service as a shortener as well.
-
Scheduling & expiration limits
-
Country, device & language targeting
-
A/B Rotation
-
Password protection, sensitive content warning
Host static sites
Upload your website files and we will host them for you.
-
HTML, CSS, JS, Video / Audio files.
-
Analytics, password protected
-
Automated tracking pixels
-
and much more...
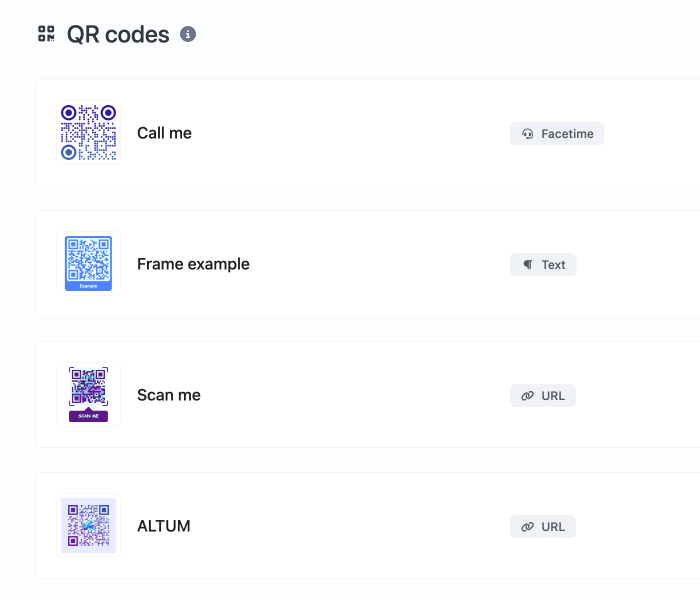
QR Codes
Fully featured QR code generator system with easy to use templates.
-
Custom colors with gradients
-
Custom logo & background branding
-
Multiple QR shapes to choose from
-
Customizable QR Code Frames
-
Vcard, WiFi, Calendar, Location..etc templates
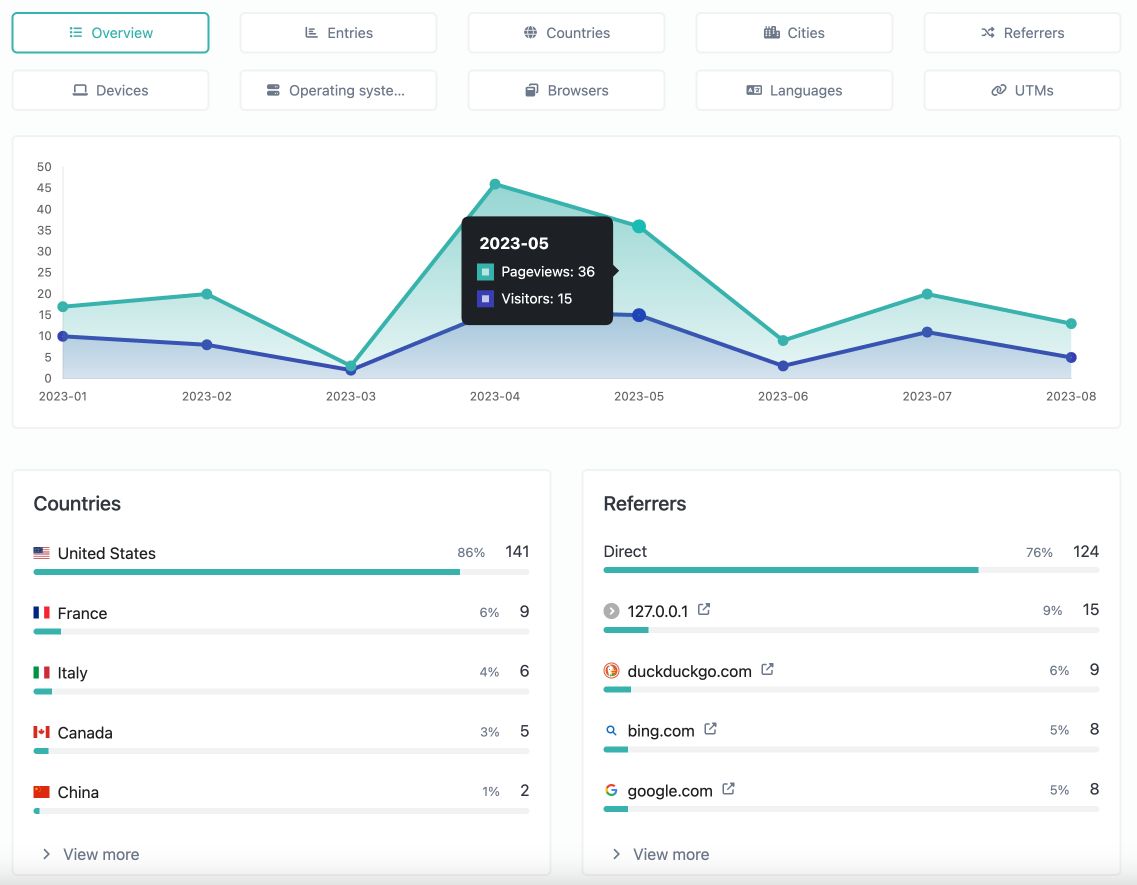
Built-in analytics
Easy to understand, yet detailed and comprehensive analytics for all your links. GDPR, CCPA and PECR compliant.
-
Countries & cities
-
Referrers & UTMs
-
Devices & operating systems
-
Browsers, Languages
File links
Generate dynamic, advanced & downloadable links to files.
Vcard links
Create dynamic digital contact cards, tracked & downloadable.
Event links
Dynamically create downloadable & tracked calendar files.
Tools
We are also offering you a set of 140 amount of useful web tools as a bonus.
Custom domains
Connect your own domain or use our predefined ones.
Projects
Easiest way to categorize your managed resources.
URLs that open apps automatically
Short links that automatically detect the used app and open it on mobile.
Links
4K+
QR Codes
73+
Tracked pageviews
118,044+
Tracking pixels
All the links easily integrate with any of the following pixel providers.
Facebook
Google Analytics
Google Tag Manager
LinkedIn
Pinterest
X
Quora
TikTok
Snapchat
Simple, transparent pricing.
Choose the plan that is right for you and your budget.
Free
0
a feature-packed, no-cost solution designed for individuals and small projects. Create a simple yet effective bio link, generate QR codes, and access fundamental marketing tools.
-
10 Biolink Pages
-
5 Biolink blocks
-
18 Enabled Biolink Blocks
-
25 Shortened Links
-
5 File Links
-
1 Vcard Links
-
1 Event Links
-
0 Static Sites
-
5 QR Codes
-
1 Projects
-
1 Splash Pages
-
2 Pixels
-
1 Custom Domains
-
365 days statistics retention
-
No forced splash page
-
Custom Back-half
-
Deep linking
-
Removable branding
-
Custom Backgrounds
-
Custom branding
-
Dofollow links
-
Leap link
-
SEO Features
-
Extra fonts
-
Custom CSS
-
Custom JS
-
Indepth Statistics
-
Links scheduling & limiter
-
Cloaking short URLs
-
Auto open app on mobile
-
UTM Parameters
-
Password protection
-
Sensitive content
-
No ads
-
API access
0 Additional domains
Starter - LinkLite
2
20
0
USD
Get started with LinkLite, the perfect plan for individuals and beginners. Create a sleek bio link, generate QR codes, and unlock essential marketing tools to establish your online presence effortlessly.
-
25 Biolink Pages
-
15 Biolink blocks
-
19 Enabled Biolink Blocks
-
25 Shortened Links
-
25 File Links
-
25 Vcard Links
-
25 Event Links
-
1 Static Sites
-
25 QR Codes
-
10 Projects
-
10 Splash Pages
-
10 Pixels
-
1 Custom Domains
-
365 days statistics retention
-
No forced splash page
-
Custom Back-half
-
Deep linking
-
Removable branding
-
Custom Backgrounds
-
Custom branding
-
Dofollow links
-
Leap link
-
SEO Features
-
Extra fonts
-
Custom CSS
-
Custom JS
-
Indepth Statistics
-
Links scheduling & limiter
-
Cloaking short URLs
-
Auto open app on mobile
-
UTM Parameters
-
Password protection
-
Sensitive content
-
No ads
-
API access
0 Additional domains
Basic - BioBoost
5
55
0
USD
Upgrade to BioBoost for an enhanced bio link experience. Unlock advanced customisation options, analytics, and additional marketing tools to boost your online reach. Perfect for small businesses and growing brands.
-
50 Biolink Pages
-
50 Biolink blocks
-
All Biolink Blocks
-
50 Shortened Links
-
60 File Links
-
50 Vcard Links
-
50 Event Links
-
3 Static Sites
-
25 QR Codes
-
20 Projects
-
5 Splash Pages
-
5 Pixels
-
3 Custom Domains
-
3,650 days statistics retention
-
No forced splash page
-
Custom Back-half
-
Deep linking
-
Removable branding
-
Custom Backgrounds
-
Custom branding
-
Dofollow links
-
Leap link
-
SEO Features
-
Extra fonts
-
Custom CSS
-
Custom JS
-
Indepth Statistics
-
Links scheduling & limiter
-
Cloaking short URLs
-
Auto open app on mobile
-
UTM Parameters
-
Password protection
-
Sensitive content
-
No ads
-
API access
0 Additional domains
Get started
Start using the swiss army knife for the marketers.