Warning: Trying to access array offset on value of type bool in /home/co/public_html/mn/wp-content/themes/barrel/archive.php on line 68

Sections

Bio Link page, Grids, Learn, Sections

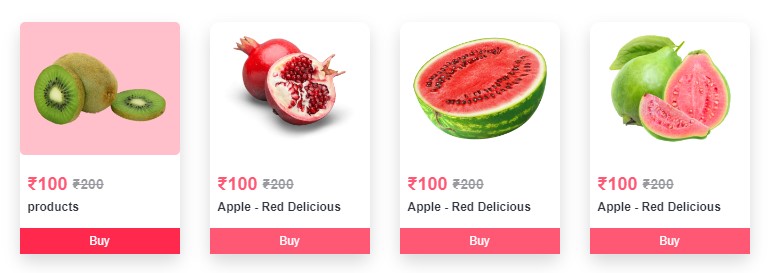
Product Grid Styles Section – 002

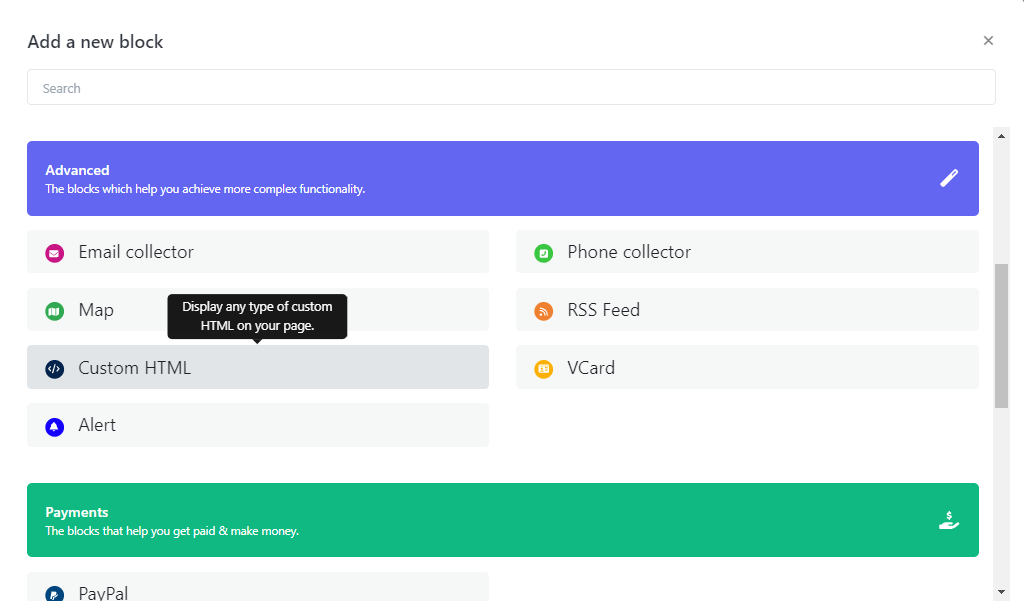
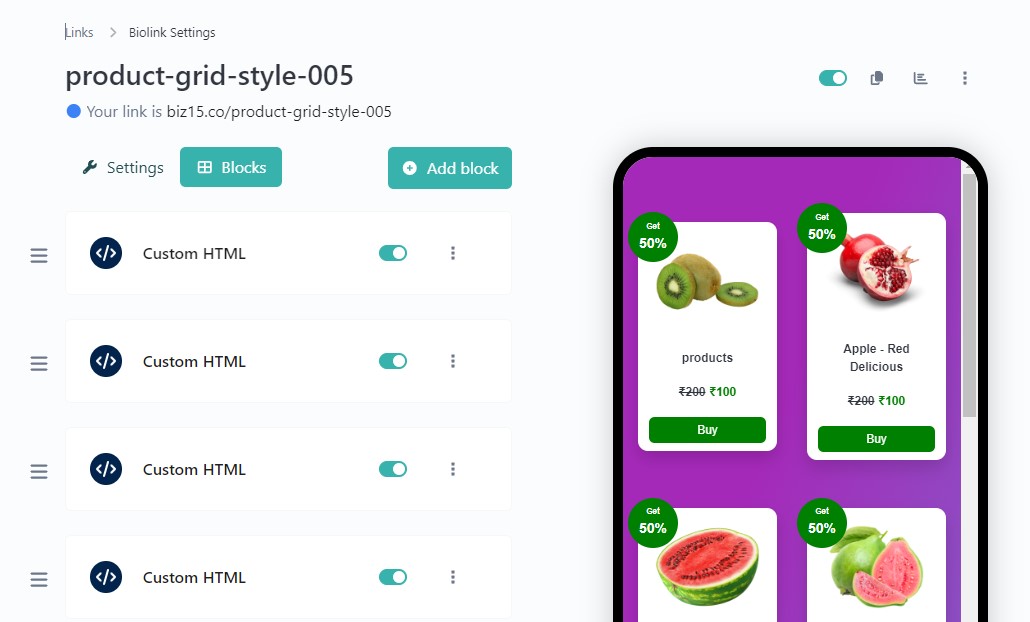
Step One: Insert a Custom HTML Block.

Step two: Just Paste below JS code into your Custom HTML block

    
<script src="https://biz15.com/trialone/custom/js/productgridstyle002.js"></script>


<script>
    // Create a new ProductsGridStyle005 object
    new ProductsGridStyle002(
        // Configuration object for the style (e.g., style 4)
        {style: 4},
        // Theme customization object with color, hoverColor, and imageHoverColor
        {theme:{
            color: "green",
            hoverColor: "darkgreen",
            imageHoverColor: "#22dd2273"
        }},
        // Array containing product details
        [
            {
                // Product details for the first item
                image: "https://biz15.co/uploads/block_images/dd9cfe7546082ed7854bb2a6c34932aa.png",
                title: "Product title",
                currency: "",
                currentPrice: 100,
                originalPrice: 200,
                labelText: "Get",
                labelPercentage: "50%",
                btnText: "Buy",
                btnLink: "#",
            },
            // ... add more product details as needed
        ]
    );
</script>

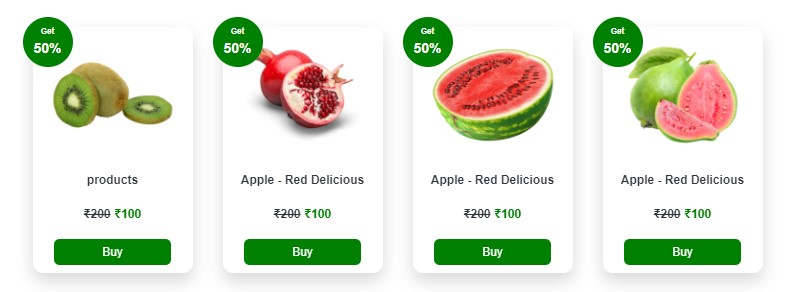
The result following the completion of the steps.
Where To Set Image And Title

Below code for Where To Set Image And Title :

    image: "your-image.png",
    title: "Product title",

Where To Set Price Setting

Below code for Where To Set Price Setting :

    currency: "",
    currentPrice: 100,
    originalPrice: 200,

Where To Set Label Text And Percentage

Below code for Where To Set Label Text And Percentage :

    labelText: "Get",
    labelPercentage: "50%",

Where To Set Button Text And Link

Below code for Where To Set Button Text And Link :

    btnText: "Buy",
    btnLink: "#",

Where To Set Theme Setting

Color, Hover Color, Image Hover Color

Below code for Where To Set Theme Setting :

    theme:{
        color: "green",
        hoverColor: "darkgreen",
        imageHoverColor: "#22dd2273"
    },

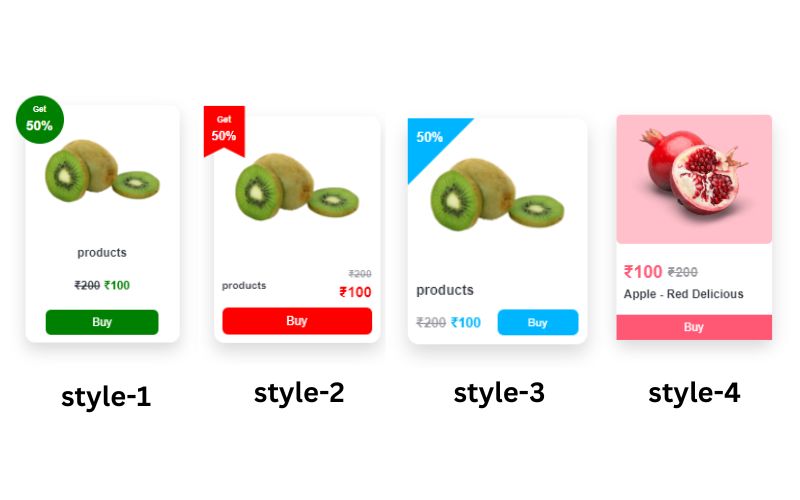
Where To Set Other Grid Styles

Below code for Where To Set Other Grid Styles :

    // here options for style we have 1 to 4
    {style: 1},
    // here options for style we have 1 to 4
    {style: 2},
    // here options for style we have 1 to 4
    {style: 3},
    // here options for style we have 1 to 4
    {style: 4},
To upload an image and retrieve its source (URL), please follow these steps :

Select or Prepare Your Image: Begin by choosing the image you wish to upload, ensuring it’s in an appropriate format (e.g., JPG, PNG).

Step One : on Your Dashboard Select “File Link” panel and click “File link” button on your Top Right corner

Step Two: Select your desired image and and its name then proceed by clicking the “Create File Url” button.

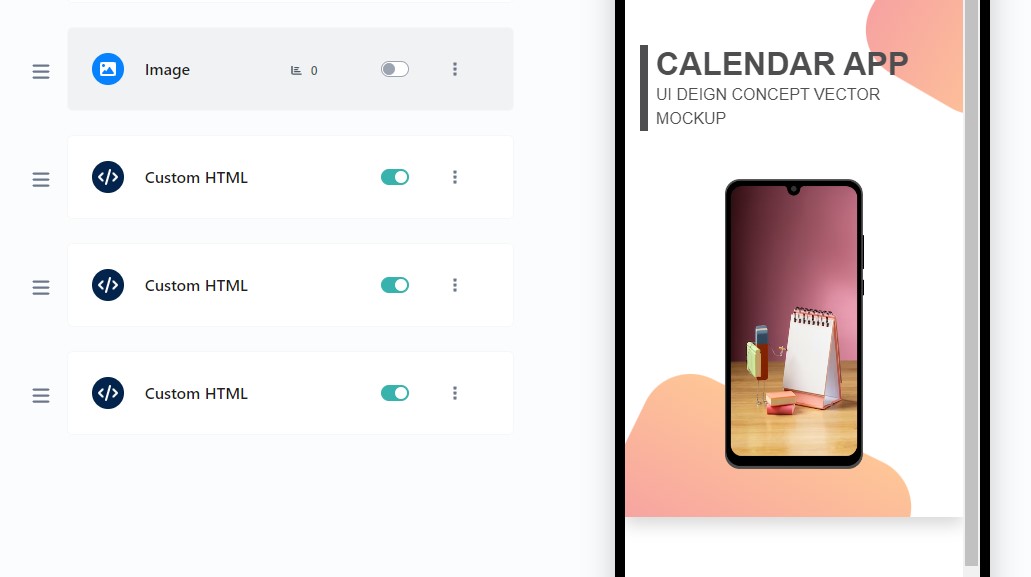
Step Three: Now, you can see bellow figure that highlighted the image url and just “Copy Your Image Address.”

“Follow the previously mentioned steps to upload and obtain the image URL for all of your images.”

Other Style Sections :

Bio Link page, Hero Section, Learn, Sections

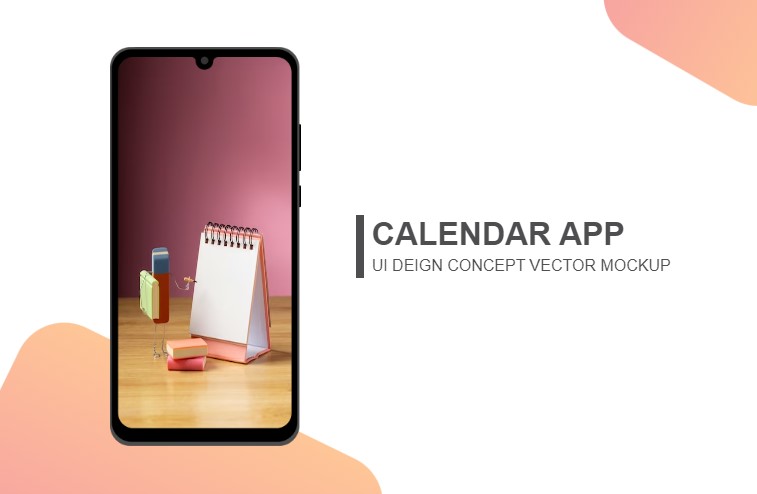
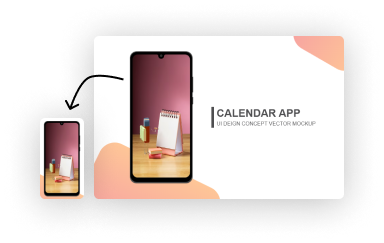
Stylish Mobile Frame Section

Step One: Insert a Custom HTML Block.

Step two: Just Paste below JS code into your Custom HTML block

<script src="https://biz15.com/trialone/custom/js/mobileshapedesign.js"></script>

<script>
// Sample data (you can replace it with your dynamic data)
new Data(
{
// mobile image
imageSrc: "https://biz15.co/uploads/block_images/b162b90616e78411827e403143253c40.png",
// mobile inner background image
phBgImg: "https://img.freepik.com/free-photo/animated-eraser-drawing-still-life_23-2149911061.jpg?w=360&t=st=1699611152~exp=1699611752~hmac=e432bf1fe202e53edc3bd03cd33de6125e31978957fdb58dadd3bfadf22ff9e1",
// title
title: "CALENDAR APP",
// sub title
subTitle: "UI DEIGN CONCEPT VECTOR MOCKUP",
// background shapes color
color1:"#f7a3a1",
color2:"#fec697",
}
);
</script>

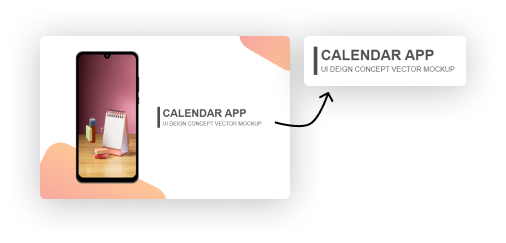
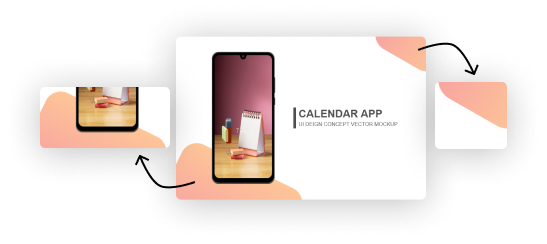
The result following the completion of the steps.

Where To Change Mobile Inner Background Image

Below code for Where To Change Mobile Inner Background Image :

{
// mobile inner background image
phBgImg: "yourimage.jpg",
}

Where To Change Title And Sub Title

Below code for Where To Change Title And Sub Title :

{
// title
title: "Your Title",
// sub title
subTitle: "Your Sub Title",
}

Where To Set Background Shape Color

Below code for Where To Set Background Shape Color :

{
// background shapes color
color1:"#f7a3a1",
color2:"#fec697",
}

To upload an image and retrieve its source (URL), please follow these steps :

Select or Prepare Your Image: Begin by choosing the image you wish to upload, ensuring it’s in an appropriate format (e.g., JPG, PNG).

Step One : on Your Dashboard Select “File Link” panel and click “File link” button on your Top Right corner

Step Two: Select your desired image and and its name then proceed by clicking the “Create File Url” button.

Step Three: Now, you can see bellow figure that highlighted the image url and just “Copy Your Image Address.”

“Follow the previously mentioned steps to upload and obtain the image URL for all of your images.”
Other Style Sections :

Bio Link page, Grids, Learn, Sections

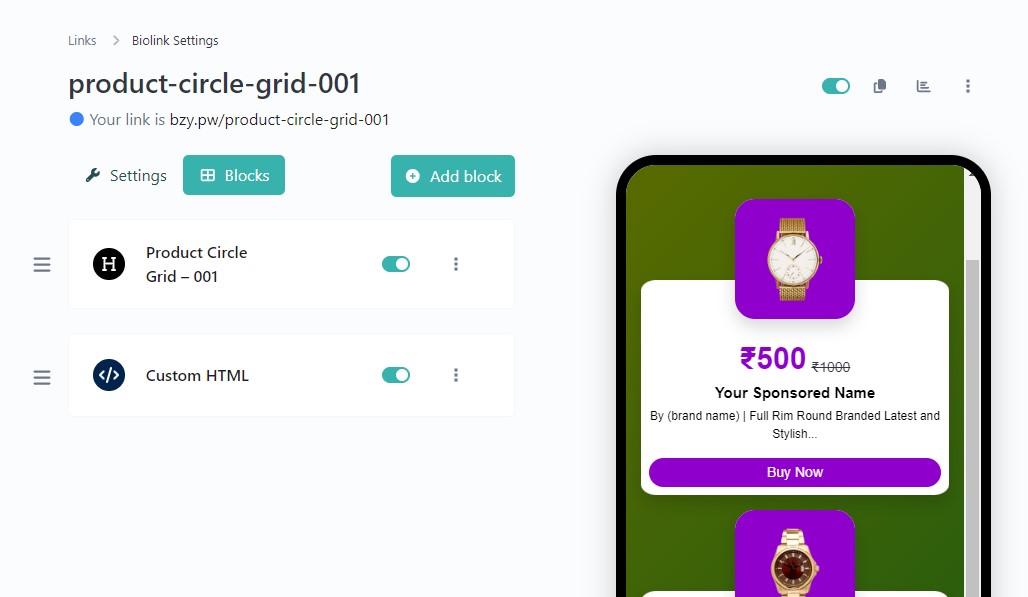
Product Circle Grid Section – 001

Step One: Insert a Custom HTML Block.

Step two: Just Paste below JS code into your Custom HTML block

<!-- Include the CircleStyleGrid JavaScript library -->
<script src="https://biz15.com/trialone/custom/js/circlestylegrid.js"></script>

<!-- Initialize CircleStyleGrid with custom settings and theme -->
<script>
// Create a new instance of CircleStyleGrid with custom style settings and theme
new CircleStyleGrid(
{ style: 2 }, /* Specify custom style settings in this case, using style 
1 to 3*/

// Specify custom theme settings for CircleStyleGrid
{
themeSetting: {
productBGColor: 'hsl(282, 100%, 40%)',
productsBoxBorderRadius: "20px",
priceColor: "hsl(282, 100%, 40%)",
titleTextColor: "black",
titleFontSize: "15px",
descriptionTextColor: "black",
descriptionFontSize: "12px",
buttonBGColor: "hsl(282, 100%, 40%)",
buttonHoverBGColor: "hsl(282, 100%, 20%)",
buttonBorderRadius: "20px",
}
}, // End of custom theme settings

// Array of product data objects to be displayed in the CircleStyleGrid
[
// Product 1
{
image: "https://biz15.co/uploads/block_images/29311539b2f7fcf9a1f825c472a6d100.png",
title: "Your Sponsored Name",
description: "By (brand name) | Full Rim Round Branded Latest and Stylish...",
currency: "",
currentPrice: 500,
originalPrice: 1000,
btnText: "Buy Now",
btnLink: "#",
},
] // End of product data array
);
</script>

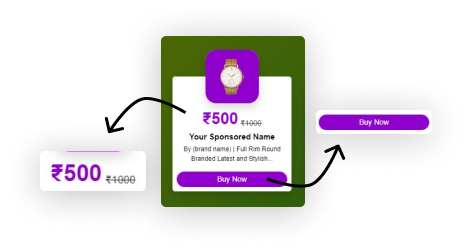
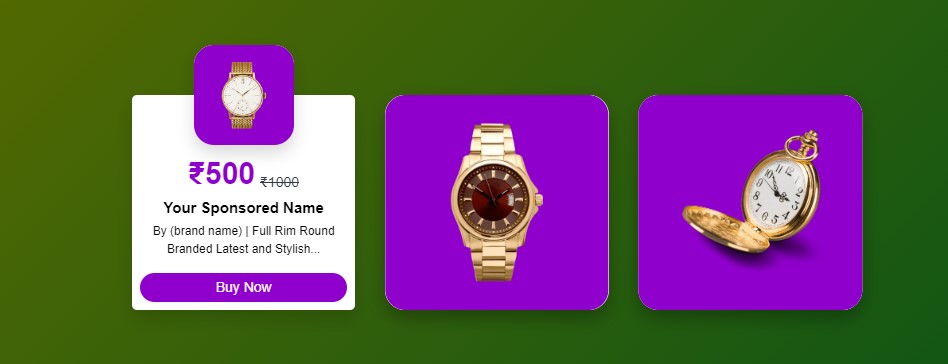
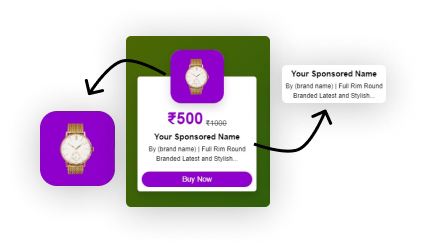
The result following the completion of the steps.

Where to Set images, Title and description

Below code for where to set image, title and description

{
image: "yourimage.jpg",
title: "Product Name",
description: "Product Description",
}

Where To Set Price And Button

Below code for Where To Set Price And Button

{
currency: "",
currentPrice: 500,
originalPrice: 1000,
btnText: "Buy Now",
btnLink: "#",
}

Where To Set Theme Settings

Below code for Where To Set Theme Settings

themeSetting: {
productBGColor: 'hsl(282, 100%, 40%)',
productsBoxBorderRadius: "20px",
priceColor: "hsl(282, 100%, 40%)",
titleTextColor: "black",
titleFontSize: "15px",
descriptionTextColor: "black",
descriptionFontSize: "12px",
buttonBGColor: "hsl(282, 100%, 40%)",
buttonHoverBGColor: "hsl(282, 100%, 20%)",
buttonBorderRadius: "20px",
}

To upload an image and retrieve its source (URL), please follow these steps :

Select or Prepare Your Image: Begin by choosing the image you wish to upload, ensuring it’s in an appropriate format (e.g., JPG, PNG).

Step One : on Your Dashboard Select “File Link” panel and click “File link” button on your Top Right corner

Step Two: Select your desired image and and its name then proceed by clicking the “Create File Url” button.

Step Three: Now, you can see bellow figure that highlighted the image url and just “Copy Your Image Address.”

“Follow the previously mentioned steps to upload and obtain the image URL for all of your images.”
Other Style Sections :

Bio Link page, Hero Section, Learn, Sections

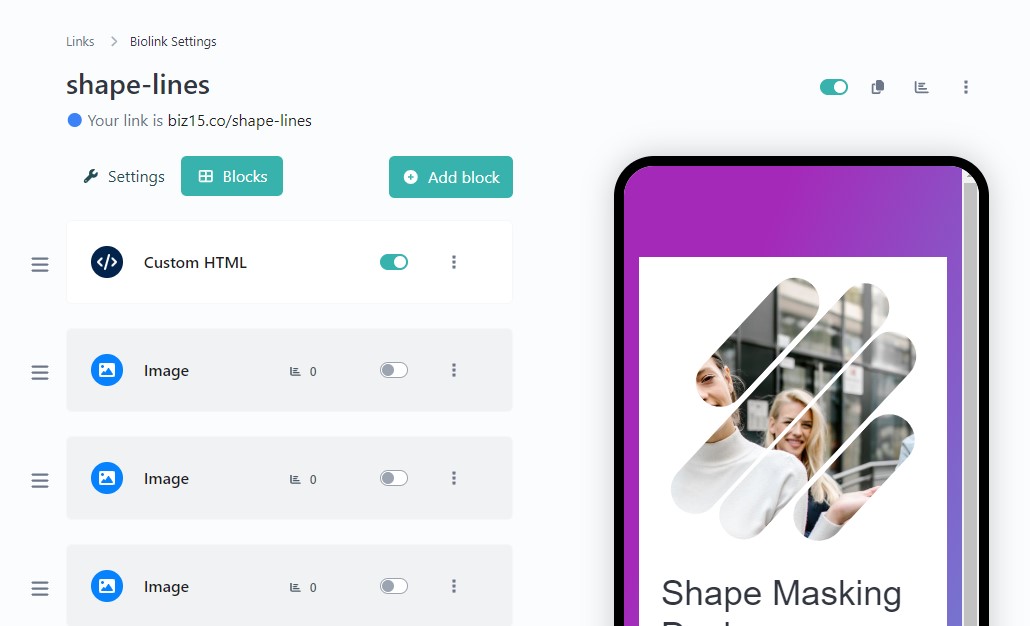
Background Image Shape Lines Section

Step One: Insert a Custom HTML Block.

Step two: Just Paste below JS code into your Custom HTML block

    <!-- Include external JavaScript file for shape masking designs -->
    <script src="https://biz15.com/trialone/custom/js/shapemaskingdesigns.js"></script>
    <!-- Initialize ShapeMaskingDesigns object with specific parameters -->
    <script>
        // Create a new ShapeMaskingDesigns object
        new ShapeMaskingDesigns({
            // Image URL for the design
            image: "https://biz15.co/uploads/block_images/a6b839437d32e768dcf8de0734afb80c.jpg",
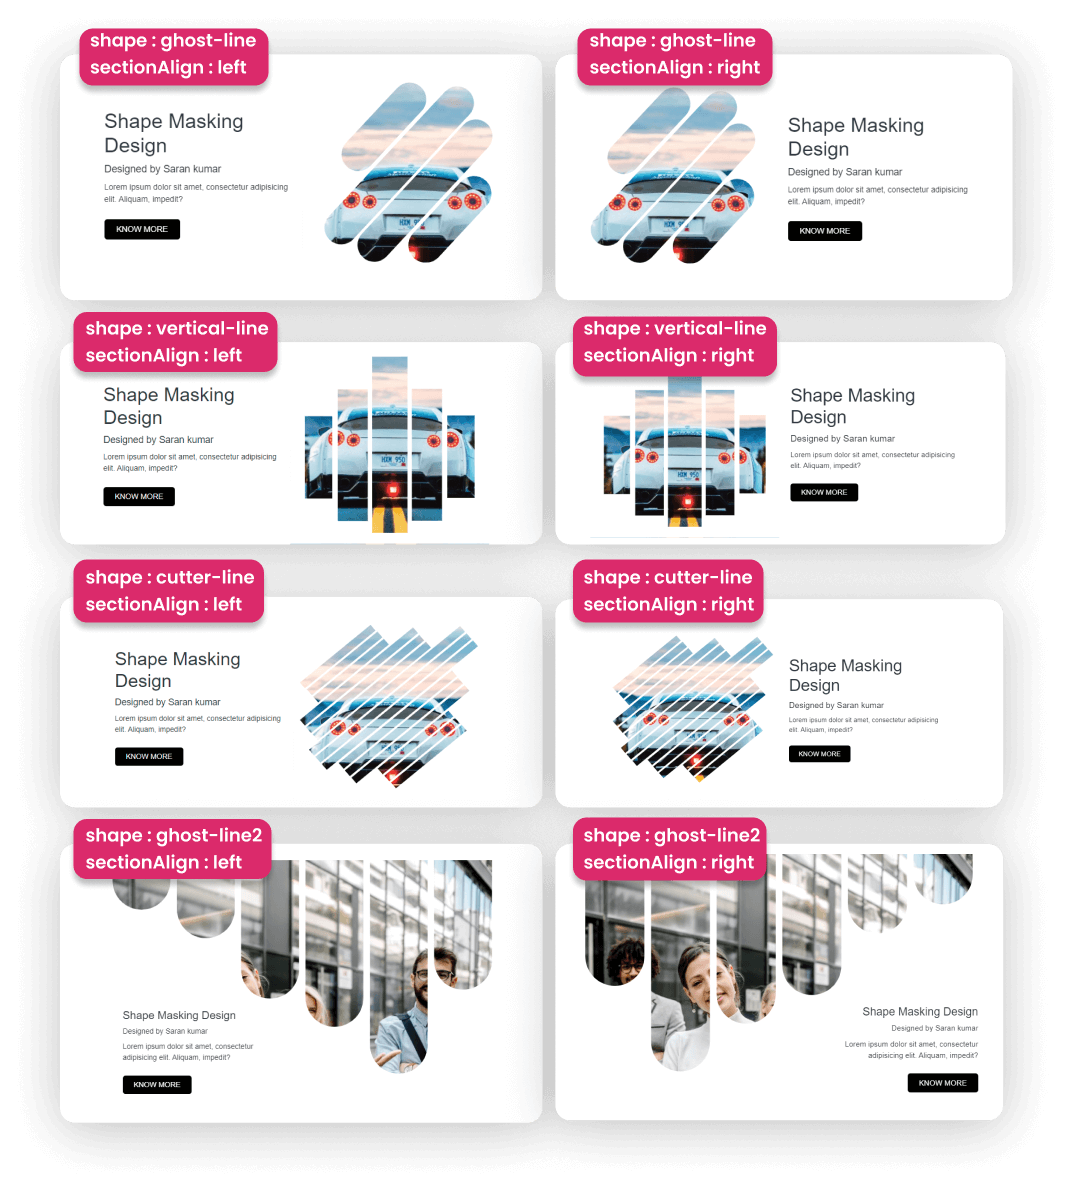
            // Type of shape used for masking (e.g., "ghost-line" , "ghost-line2" , "vertical-line" and "cutter-line")
            shape: "ghost-line",
            // Alignment of the design section (e.g., "left" and "right")
            sectionAlign: "left",
            // Title of the design
            title: "Shape Masking Design",
            // Short title or designer information
            shortTitle: "Designed by Saran kumar",
            // Description or content for the design
            paragraph: "Lorem ipsum dolor sit amet, consectetur adipisicing elit. Aliquam, impedit?",
            // Button details, including text, link, and styling
            button: {
                text: "KNOW MORE",
                link: "#",
                color: "white",
                backgroundColor: "black",
                hoverColor: "white",
                hoverBackgroundColor: "#dc3545",
            }
        });
    </script>

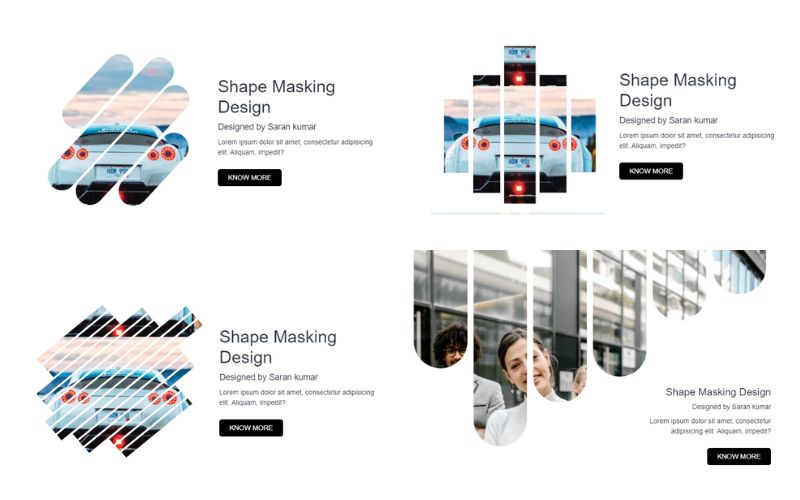
The result following the completion of the steps.

Where To Set Title, Short Title, Paragraph And Section Alignment

Below Code For Where To Set Title, Short Title, Paragraph And Section Alignment :

    title: "Title of the design",
    shortTitle: "Short title or designer information",
    paragraph: " Description or content for the design",
    // Alignment of the design section (e.g., "left" and "right")
    sectionAlign: "left",

Where To Change Image

Below code for Where To Change Image :

    image: "your-image.jpg",

Where To Set Button Details And Style

Below code for Where To Set Button Details And Style :

    // Button details, including text, link, and styling
    button: {
        text: "KNOW MORE",
        link: "#",
        color: "white",
        backgroundColor: "black",
        hoverColor: "white",
        hoverBackgroundColor: "#dc3545",
    }

Where To Change Shape Design

Design shape links just copy and paste this link in a JS data : (shape: ” “,)

Below code for Where To Change Shape Design :

    // Type of shape used for masking (e.g., "ghost-line" , "ghost-line2" , "vertical-line" and "cutter-line")
    shape: "ghost-line",

To upload an image and retrieve its source (URL), please follow these steps :

Select or Prepare Your Image: Begin by choosing the image you wish to upload, ensuring it’s in an appropriate format (e.g., JPG, PNG).

Step One : on Your Dashboard Select “File Link” panel and click “File link” button on your Top Right corner

Step Two: Select your desired image and and its name then proceed by clicking the “Create File Url” button.

Step Three: Now, you can see bellow figure that highlighted the image url and just “Copy Your Image Address.”

“Follow the previously mentioned steps to upload and obtain the image URL for all of your images.”
Other Style Sections :

Bio Link page, Grids, Learn, Sections

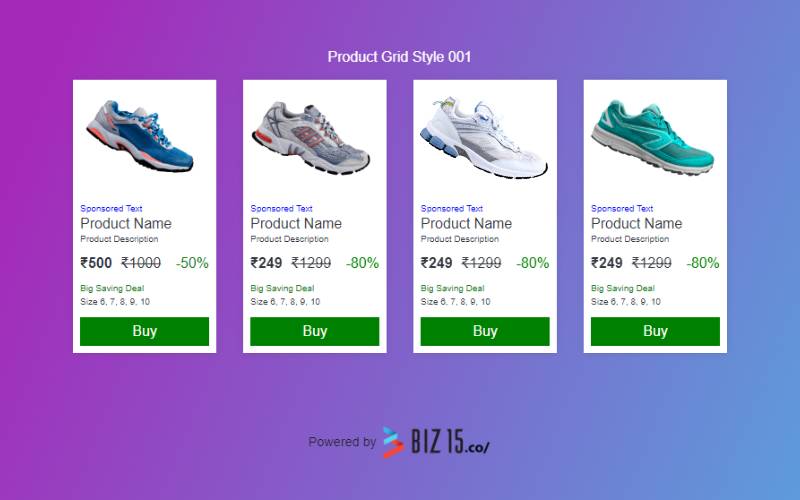
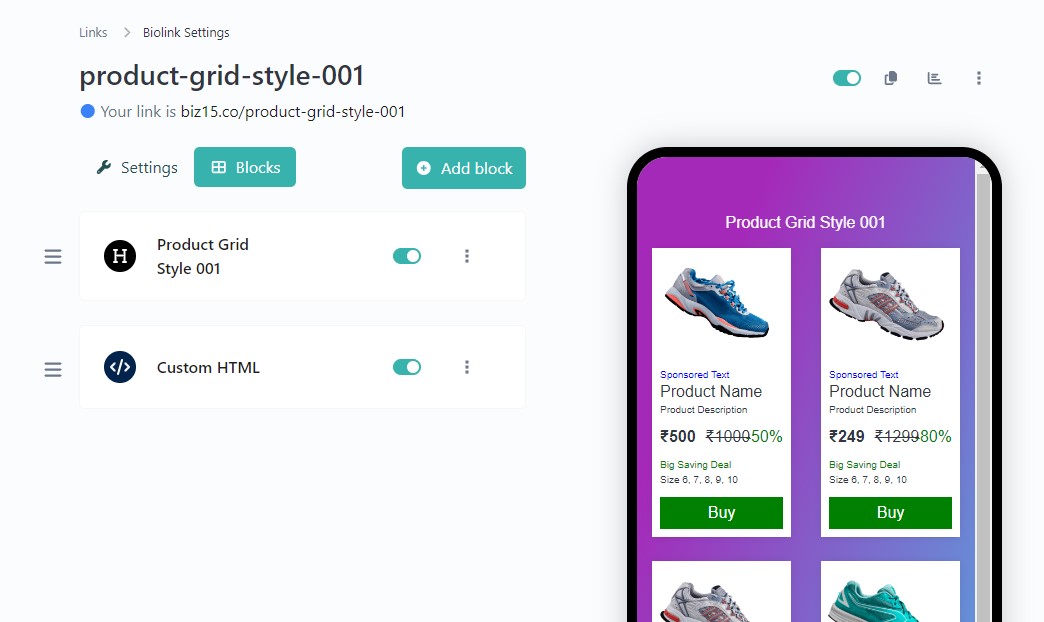
Product Grid Style Section – 001

Step One: Insert a Custom HTML Block.

Step two: Just Paste below JS code into your Custom HTML block

    <!-- Include external JavaScript file -->
    <script src="https://biz15.com/trialone/custom/js/productgridstyle001.js"></script>
    
    <!-- Initialize the ProductGridStyle001 object with theme colors, column configuration, and an array of products -->
    <script id="ProductgridStyle001">
    
        // Create an instance of ProductGridStyle001
        new ProductGridStyle001(
    
            // First parameter: Theme colors
            {
                theme: { colorOne: "green", colorTwo: "blue" }
            },
    
            // Second parameter: Number of columns for desktop, tablet, and mobile views
            {
                columns: { desktop: 3, tablet: 3, mobile: 2 }
            },
    
            // Third parameter: Array of products
            [
                // Product details
                {
                    image: "https://biz15.co/uploads/block_images/247a851f686a88da30e19ed75afc7ebd.png",
                    sponsored: "Sponsored Text",
                    productName: "Product Name",
                    description: "Product Description",
                    currency: "",
                    currentPrice: 500,
                    originalPrice: 1000,
                    discount: true,
                    offerText: "Big Saving Deal",
                    ProductDetails: "Size 6, 7, 8, 9, 10",
                    btnText: "Buy",
                    btnLink: "#",
                },
                // Additional products can be added here
            ]
        );
    </script>

The result following the completion of the steps.

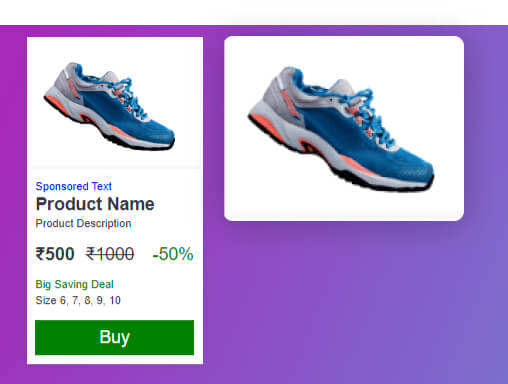
Where To Add Product Image

Below Code For Where To Add Product Image.

    image: "your-product-image.png",

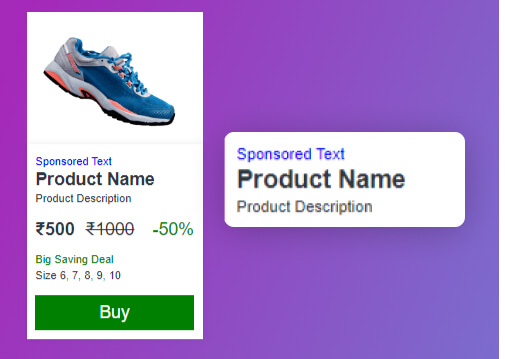
Where To Add Product Title And Its Descriptions

Below Code For Where To Add Product Title And Its Descriptions.

    sponsored: "Sponsored Text",
    productName: "Product Name",
    description: "Product Description",

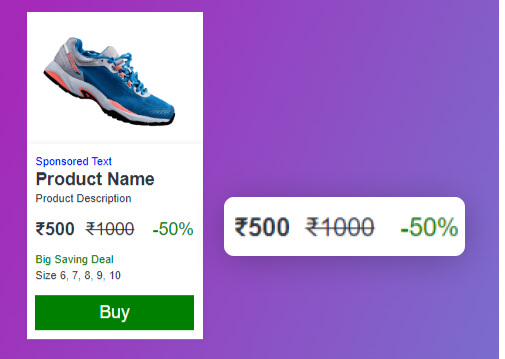
Where To Set Product Price And Discount Offers

Below Code For Where To Set Product Price And Discount Offers.

    currentPrice: 500,
    originalPrice: 1000,
    discount: true,

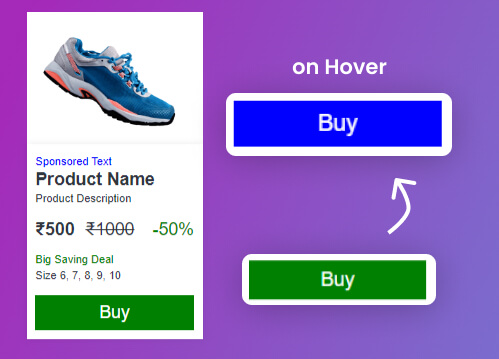
Where To Set Product Buy Button Link

Below Code For Where To Set Product Buy Button Link.

    //Setting Your Button Text and Link
    btnText: "Buy",
    btnLink: "#",

How To Modify The Responsiveness Of The Grid

Below Code For How To Modify The Responsiveness Of The Grid.

    // Second parameter: Number of columns for desktop, tablet, and mobile views
    {
        columns: { desktop: 3, tablet: 3, mobile: 2 }
    },

How To set Theme Color

Below Code For How To set Theme Color.

    // First parameter: Theme colors
    {
        theme: { colorOne: "green", colorTwo: "blue" }
    },

To upload an image and retrieve its source (URL), please follow these steps :

Select or Prepare Your Image: Begin by choosing the image you wish to upload, ensuring it’s in an appropriate format (e.g., JPG, PNG).

Step One : on Your Dashboard Select “File Link” panel and click “File link” button on your Top Right corner

Step Two: Select your desired image and and its name then proceed by clicking the “Create File Url” button.

Step Three: Now, you can see bellow figure that highlighted the image url and just “Copy Your Image Address.”

“Follow the previously mentioned steps to upload and obtain the image URL for all of your images.”
Other Style Sections :

Bio Link page, Hero Section, Learn, Sections

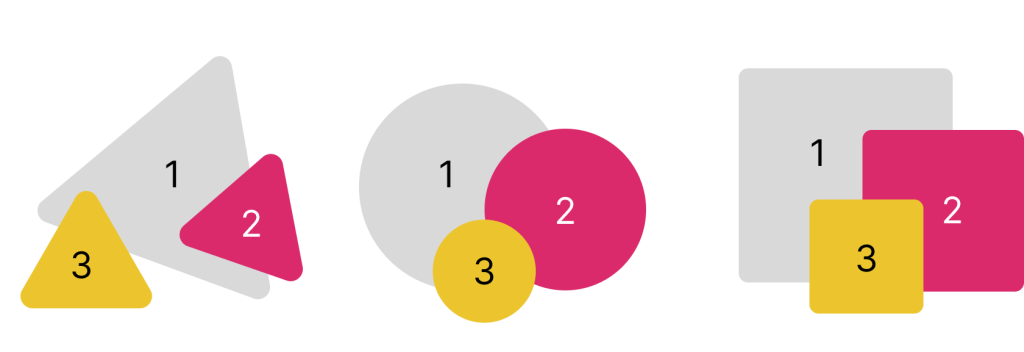
Geometrical Three Shapes Designs Style Section

Step One: Insert a Custom HTML Block.

Step two: Just Paste below JS code into your Custom HTML block

    <!-- Include external JavaScript file -->
    <script src="https://biz15.com/trialone/custom/js/threeshapedesigns.js"></script>
    
    <!-- Initialize the ThreeShapeDesigns object with an array of designs -->
    <script id="threeShapeDesigns">
    
        // Create an instance of ThreeShapeDesigns
        new ThreeShapeDesigns([
            // Design details for the first item in the array
            {
                // Design style (e.g., "triangle" , "circle" , "square")
                style: "triangle", 
    
                // URLs for three images associated with the design
                image1: "image-1.jpg",
                image2: "image-2.jpg",
                image3: "image-3.jpg",
    
                // Title of the design
                title: "Your Title Goes Here",
    
                // Title color
                titleColor: "blue",
    
                // Paragraph describing the design
                paragraph: "Your Paragraph Goes Here"
            }
        ]);
    </script>

The result following the completion of the steps.

Where to Set Title And Description

Here’s an example of Where to Set Title And Description

    // Title of the design
    title: "Your Title Goes Here",

    // Title color
    titleColor: "blue",

    // Paragraph describing the design
    paragraph: "Your Paragraph Goes Here"

Where and How to Set Shape Type

Here’s an example of Where and How to Set Shape Type ,

options : “triangle” , “circle” and “square”

    // Design style (e.g., "triangle" , "circle" , "square")
    style: "triangle", 
    // Design style (e.g., "triangle" , "circle" , "square")
    style: "circle", 
    // Design style (e.g., "triangle" , "circle" , "square")
    style: "square", 

Where and How to Add Your Images in Three Shape Designs

This design only and must need three images

below code for Where and How to Add Your Images in Three Shape Designs :

    // URLs for three images associated with the design
    image1: "image-1.jpg",
    image2: "image-2.jpg",
    image3: "image-3.jpg",

To upload an image and retrieve its source (URL), please follow these steps :

Select or Prepare Your Image: Begin by choosing the image you wish to upload, ensuring it’s in an appropriate format (e.g., JPG, PNG).

Step One : on Your Dashboard Select “File Link” panel and click “File link” button on your Top Right corner

Step Two: Select your desired image and and its name then proceed by clicking the “Create File Url” button.

Step Three: Now, you can see bellow figure that highlighted the image url and just “Copy Your Image Address.”

“Follow the previously mentioned steps to upload and obtain the image URL for all of your images.”
Other Style Sections :

Bio Link page, Header, Learn, Sections

biopage Navbar Classic style 001

Step One: Insert a Custom HTML Block.

Step two: Just Paste below HTML code into your Custom HTML block

 <!-- Include the navbar-plugin.js library -->
<script src="https://biz15.com/trialone/custom/js/navbar-plugin.js"></script>

<!-- Initialize the navigation bar with custom settings -->
<script>
   // Create a new navigation bar using the CreateNavBar constructor
   new CreateNavBar({
       // Navbar Style: Choose from different styles (1 to 4)
       navbarStyle: 4,

       // Logo settings
       logo: "https://placehold.co/250x100/ffff00/000000?text=LOGO",
       logoWidthSize: '100px',

       // Theme and background color
       navbarBG: '#085280',
       linkColor: 'white',
       linkHoverColor: 'yellow',
       btnColor: "black",
       btnHoverColor: "black",
       btnBGColor: "white",
       btnBGHoverColor: "yellow",

       // Contact information
       email: "example@gamil.com",
       phone: "+91987654321",

       // Social Platform information
       socialsIconsGap: '20px',
       socials: [
           { icon: 'fab fa-facebook', link: '#' },     // Facebook icon and link
           { icon: 'fab fa-instagram', link: '#' },    // Instagram icon and link
           { icon: 'fab fa-whatsapp', link: '#' },     // WhatsApp icon and link
       ],

       // Navigation links
       navLinks: [
           {
               name: "Home",
               link: "https://example.com/home",
           },
           {
               name: "About",
               link: "https://example.com/about",
           },
           {
               name: "Service",
               link: "https://example.com/service",
               // DropDown Navigation links
               dropDownLinks: [
                   {
                       name: "Sub Page Home",
                       link: "https://example.com/subhome"
                   },
                   {
                       name: "Sub Page About",
                       link: "https://example.com/subhome"
                   },
                   {
                       name: "Sub Page Service",
                       link: "https://example.com/subhome"
                   },
                   {
                       name: "Sub page Contact",
                       link: "https://example.com/subhome"
                   },
               ]
           },
           {
               name: "Contact",
               link: "https://example.com/contact",
               // DropDown Navigation links
               dropDownLinks: [
                   {
                       name: "Sub Page Home",
                       link: "https://example.com/subhome"
                   },
                   {
                       name: "Sub Page About",
                       link: "https://example.com/subhome"
                   },
                   {
                       name: "Sub Page Service",
                       link: "https://example.com/subhome"
                   },
                   {
                       name: "Sub page Contact",
                       link: "https://example.com/subhome"
                   },
               ]
           },
       ],
       // Form configuration
       formConfig : {
           deactivateFormPopup:false,
           //if deactivateFormPopup is true then only that button navigate to below path  
           link : '#',
           formUrl: "https://example.com/form",
           formButton: {
               text: "Get Contacted",
               iconClassName: "fa-solid fa-pen",
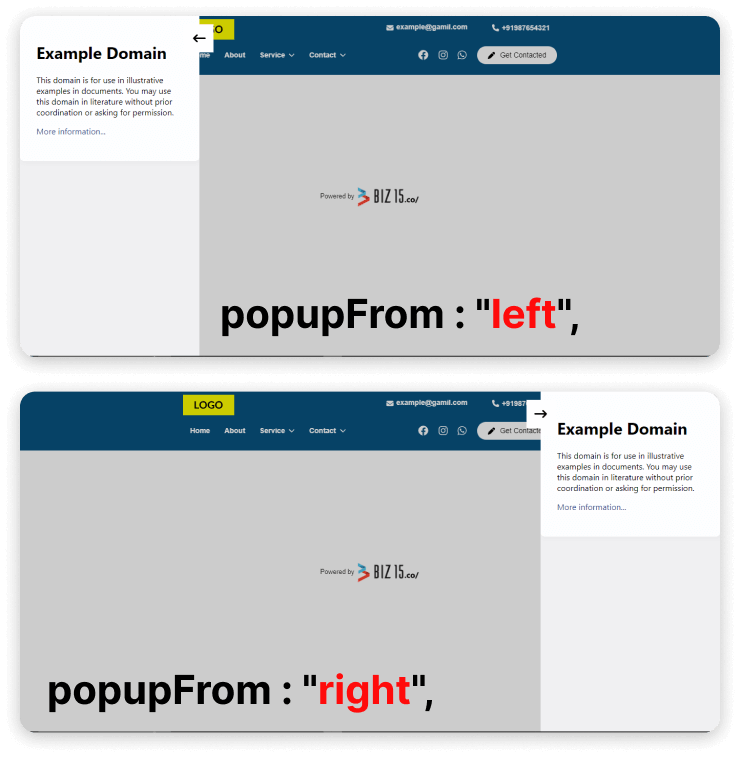
               popupFrom : "left",
           }
       }
   });
</script>

The result following the completion of the steps.

Where To Set Logo image & Size Setting

Below the code for Where To Set Logo image & Size Setting :

    // Logo settings
   logo: "https://placehold.co/250x100/ffff00/000000?text=LOGO",
   logoWidthSize: '100px',          

Where To Set Navbar Theme Setting

The following code shows Where To Set Navbar Theme Setting :

  // Theme and background color
       navbarBG: '#085280',
       linkColor: 'white',
       linkHoverColor: 'yellow',
       btnColor: "black",
       btnHoverColor: "black",
       btnBGColor: "white",
       btnBGHoverColor: "yellow",

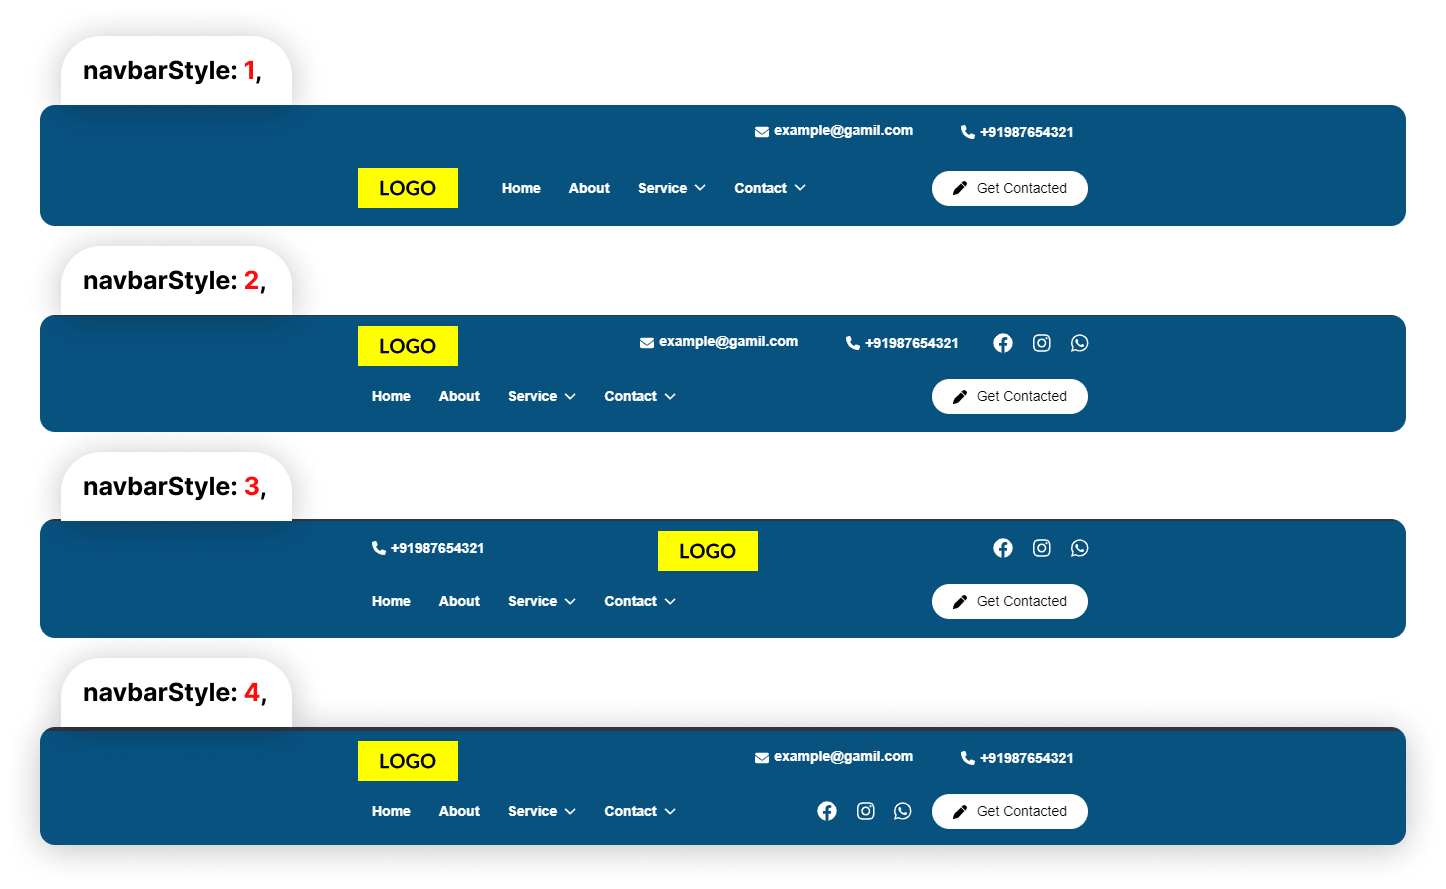
Where To Set Navbar Style

The below code shows Where To Set Navbar Style :

 // Navbar Style: Choose from different styles (1 to 4)
       navbarStyle: 4,

Where To Set Navbar Dropdown

The following code shows Where To Set Navbar Dropdown

dropDownLinks: [
{
name: "Sub Page Home",
link: "https://example.com/subhome"
},
]

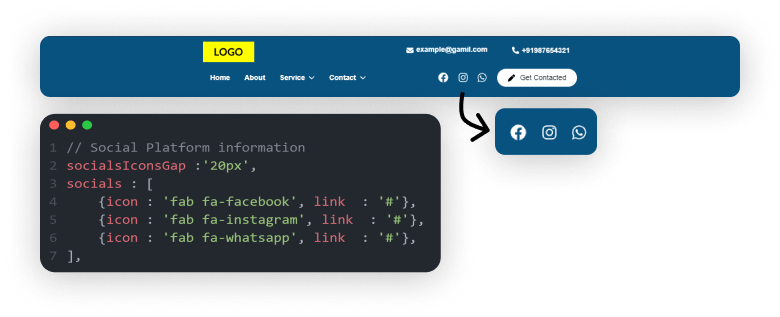
Where To Set Social Icons

The following code shows Where To Set Social Icons :

// Social Platform information
       socialsIconsGap: '20px',
       socials: [
           { icon: 'fab fa-facebook', link: '#' },     // Facebook icon and link
           { icon: 'fab fa-instagram', link: '#' },    // Instagram icon and link
           { icon: 'fab fa-whatsapp', link: '#' },     // WhatsApp icon and link
       ],

Where To Set Navigation Links In Navbar

The following code shows Where To Set Navigation Links In Navbar :

    // Navigation links
   navLinks: [
       { name: "Home", link: "https://example.com/home" },
       { name: "About", link: "https://example.com/about" },
       { name: "Contact", link: "https://example.com/cantact" },
        // Additional Links separated by commas you can add links
   ],

separated by commas you can add more navigation link

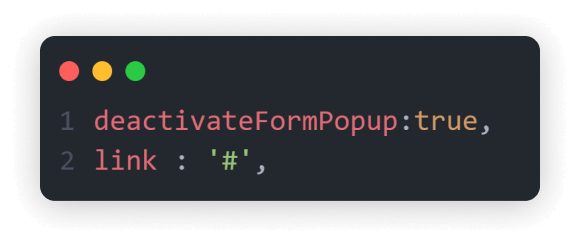
Where To Set Popup Form in Navbar

The following code shows Where To Set Popup Form in Navbar :

   // Form configuration
       formConfig : {
           deactivateFormPopup:false,
           //if deactivateFormPopup is true then only that button navigate to below path  
           link : '#',
           formUrl: "https://example.com/form",
           formButton: {
               text: "Get Contacted",
               iconClassName: "fa-solid fa-pen",
               popupFrom : "left",
           }
       }

If deactivateFormPopup is true then only that button navigate to another page by that below link path

If deactivateFormPopup is false then only form popup will works

To upload an image and retrieve its source (URL), please follow these steps :

Select or Prepare Your Image: Begin by choosing the image you wish to upload, ensuring it’s in an appropriate format (e.g., JPG, PNG).

Step One : on Your Dashboard Select “File Link” panel and click “File link” button on your Top Right corner

Step Two: Select your desired image and and its name then proceed by clicking the “Create File Url” button.

Step Three: Now, you can see bellow figure that highlighted the image url and just “Copy Your Image Address.”

“Follow the previously mentioned steps to upload and obtain the image URL for all of your images.”
Other Style Sections :

Bio Link page, Learn, Sections, Slider And Carousel

Create Infinite Carousel on Biopage

Step One: Insert a Custom HTML Block.

Step two: Just Paste below JS code into your Custom HTML block

<!-- JS CODE -->
      <!-- Include the script for the infinity carousel -->
      <script src="https://biz15.com/trialone/custom/js/infinity-carousel.js"></script>

      <!-- Create an instance of the Infinity Carousel with specified options -->
      <script>
          // Instantiate the Infinity Carousel with your ID and configuration
          new CreateInfinityCarousel("your-id", {
              // Size of each image in the carousel
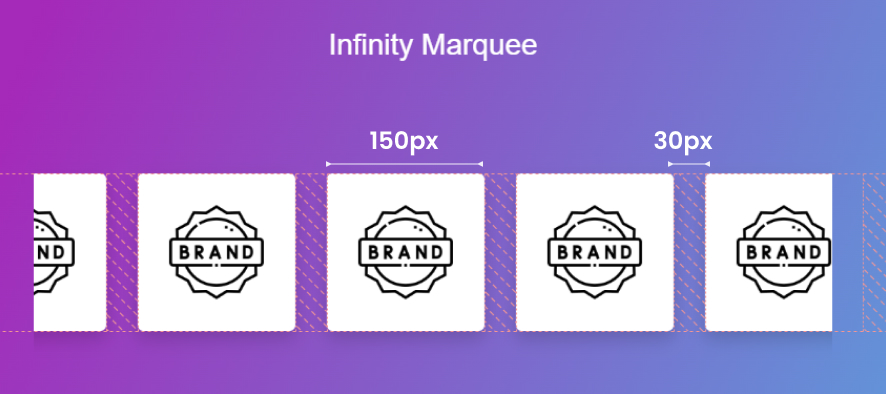
              imageSize: "200px",
              // Gap between images
              imageGap: "50px",
              // Speed of the carousel animation
              speed: "10s",
              // Array of image URLs for the carousel
              image: [
"https://cdn-icons-png.flaticon.com/128/5486/5486264.png",
                  "https://cdn-icons-png.flaticon.com/128/5486/5486264.png",
                  "https://cdn-icons-png.flaticon.com/128/5486/5486264.png",
                  "https://cdn-icons-png.flaticon.com/128/5486/5486264.png",
                  "https://cdn-icons-png.flaticon.com/128/5486/5486264.png",
                  "https://cdn-icons-png.flaticon.com/128/5486/5486264.png",
                  "https://cdn-icons-png.flaticon.com/128/5486/5486264.png",
                  "https://cdn-icons-png.flaticon.com/128/5486/5486264.png",
                  "https://cdn-icons-png.flaticon.com/128/5486/5486264.png",
                  "https://cdn-icons-png.flaticon.com/128/5486/5486264.png",
              ],
          });
      </script>

The result following the completion of the steps.

Set Size and Gap in infinite Carousel

Create A Stunning Web Pages

  // Size of each image in the carousel
  imageSize: "200px",
  // Gap between images
  imageGap: "50px",

Set speed in infinite carousel

The following code shows how to set speed in infinite marquee

  // Speed of the carousel animation
  speed: "10s",

Add images in infinite carousel

The following code shows how to ad images in infinite marquee

    // Array of image URLs for the carousel
    image: [
        "yourimage.png",
        "yourimage.png",
        "yourimage.png",
        "yourimage.png",
        "yourimage.png",
        // Add more images separated by commas
    ],

To upload an image and retrieve its source (URL), please follow these steps :

Select or Prepare Your Image: Begin by choosing the image you wish to upload, ensuring it’s in an appropriate format (e.g., JPG, PNG).

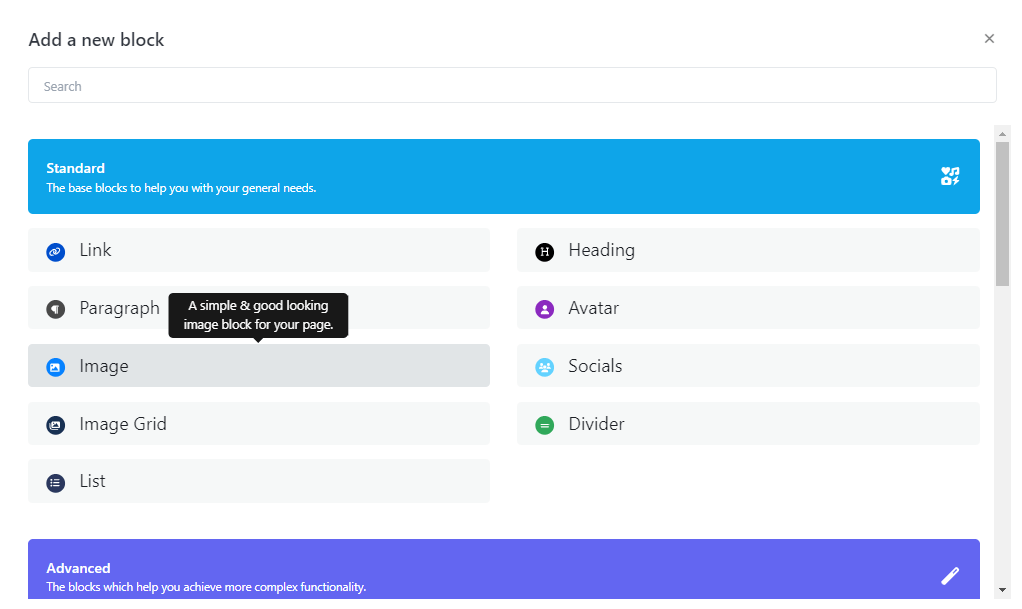
Step One : Insert an image block into your biography page.

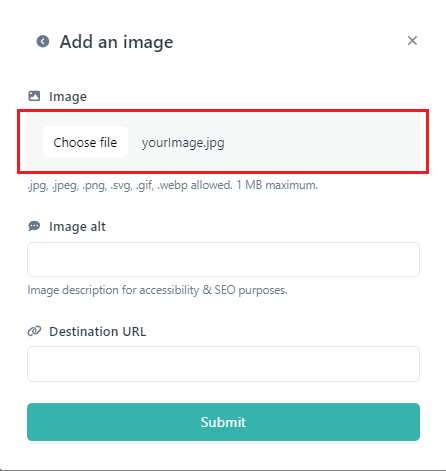
Step Two: Select your desired image and proceed by clicking the “Submit” button.

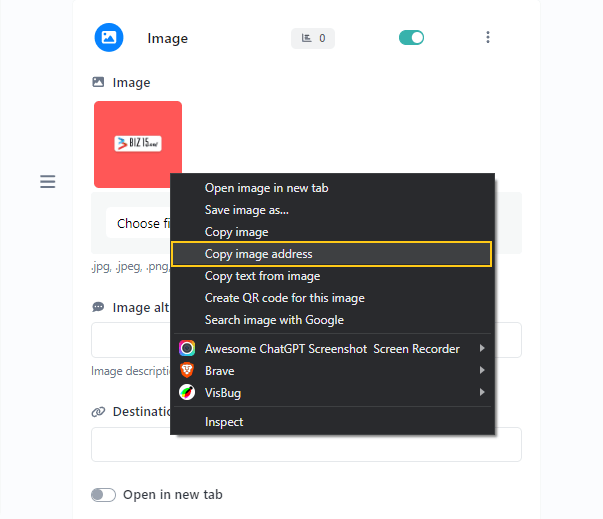
Step Three: Now, open your image block, right-click on the image, and select “Copy Image Address.”

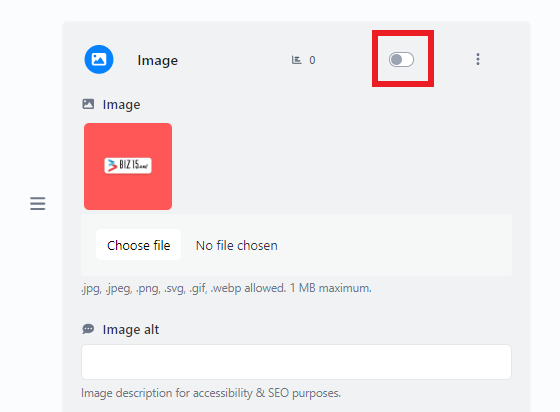
Step Four: Ensure that your image is not visible in the live view by disabling your status.

Here is an example of how you can use the image source (URL) in an HTML “img” tag:

    <img src="https://biz15.co/yourImage.jpg" alt="Description of the Image">

Replace ‘https://biz15.co/yourImage.jpg’ with the actual URL you received during the image upload process.

“Follow the previously mentioned steps to upload and obtain the image URL for all of your images.”
Other Style Sections :

Bio Link page, Learn, Sections, Tabs

Product Tab Style section

Step One: Insert a Custom HTML Block.

Step two: Just Paste below JS code into your Custom HTML block

<script src="https://biz15.com/trialone/custom/js/tab-plugin.js"></script>
<script>
new CreateTabs("tabs-products" , "animate__bounceIn", 
{
themeColor : 'green',
buttonTextColor : 'white',
buttonHoverTextColor : "white",
buttonBGColor : 'red',
buttonHoverBGColor : "green",
buttonBorderRadius : "20px"
},
[
{
tabName : "Food",
products : [
{
productImageUrl : 'https://placehold.co/500x350',
productTitle: 'Product Title',
productTag : 'Non Veg',
button : {
name : 'Buy Now',
link : '#'
}
},
{
productImageUrl : 'https://placehold.co/500x350',
productTitle: 'Product Title',
productTag : 'Non Veg',
button : {
name : 'Buy Now',
link : '#'
}
},
{
productImageUrl : 'https://placehold.co/500x350',
productTitle: 'Product Title',
productTag : 'Non Veg',
button : {
name : 'Buy Now',
link : '#'
}
},
{
productImageUrl : 'https://placehold.co/500x350',
productTitle: 'Product Title',
productTag : 'Non Veg',
button : {
name : 'Buy Now',
link : '#'
}
},
],
},
{
tabName : "Non Veg",
products : [
{
productImageUrl : 'https://placehold.co/500x350',
productTitle: 'Product Title',
productTag : 'Non Veg',
button : {
name : 'Buy Now',
link : '#'
}
},
{
productImageUrl : 'https://placehold.co/500x350',
productTitle: 'Product Title',
productTag : 'Non Veg',
button : {
name : 'Buy Now',
link : '#'
}
},
{
productImageUrl : 'https://placehold.co/500x350',
productTitle: 'Product Title',
productTag : 'Non Veg',
button : {
name : 'Buy Now',
link : '#'
}
},
{
productImageUrl : 'https://placehold.co/500x350',
productTitle: 'Product Title',
productTag : 'Non Veg',
button : {
name : 'Buy Now',
link : '#'
}
},
],
},
{
tabName : "Vegetable",
products : [
{
productImageUrl : 'https://placehold.co/500x350',
productTitle: 'Product Title',
productTag : 'Non Veg',
button : {
name : 'Buy Now',
link : '#'
}
},
{
productImageUrl : 'https://placehold.co/500x350',
productTitle: 'Product Title',
productTag : 'Non Veg',
button : {
name : 'Buy Now',
link : '#'
}
},
{
productImageUrl : 'https://placehold.co/500x350',
productTitle: 'Product Title',
productTag : 'Non Veg',
button : {
name : 'Buy Now',
link : '#'
}
},
{
productImageUrl : 'https://placehold.co/500x350',
productTitle: 'Product Title',
productTag : 'Non Veg',
button : {
name : 'Buy Now',
link : '#'
}
},
],
},
{
tabName : "Burgers",
products : [
{
productImageUrl : 'https://placehold.co/500x350',
productTitle: 'Product Title',
productTag : 'Non Veg',
button : {
name : 'Buy Now',
link : '#'
}
},
{
productImageUrl : 'https://placehold.co/500x350',
productTitle: 'Product Title',
productTag : 'Non Veg',
button : {
name : 'Buy Now',
link : '#'
}
},
{
productImageUrl : 'https://placehold.co/500x350',
productTitle: 'Product Title',
productTag : 'Non Veg',
button : {
name : 'Buy Now',
link : '#'
}
},
{
productImageUrl : 'https://placehold.co/500x350',
productTitle: 'Product Title',
productTag : 'Non Veg',
button : {
name : 'Buy Now',
link : '#'
}
},
],
},
])
</script>

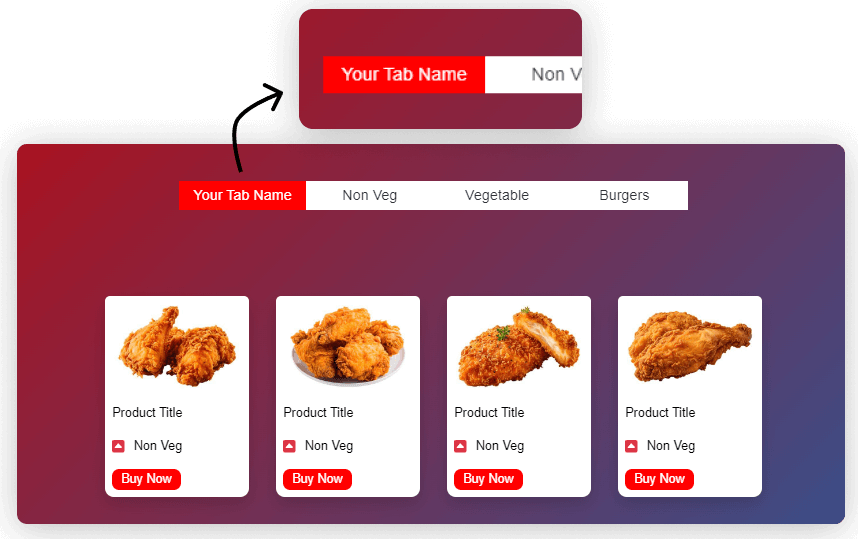
The result following the completion of the steps.

How to set Tabs Name

Create A Stunning Web Pages

  //Here you can Set Tab name, as same as for all tabs
  tabName : "Your Tab Name",

How to add Products in each Tabs

The following code shows how to add products as same as for all tabs

  products : [
      {
          // Product details
          productImageUrl : 'yourimage.png', // URL for the product image
          productTitle: 'Product Title', // Title of the product
          productTag : 'Product Tag', // Tag associated with the product
          
          // Button details
          button : {
              name : 'Buy Now', // Text on the button
              link : ' # ' // Link or action when the button is clicked
          }
      },
      //separated by commas you can Add more products if needed

How to set button link for each products

The following code shows how to set button link for each products as same as for all tabs

  button : {
      name : 'Buy Now', // Text on the button
      link : ' # ' // Link or action when the button is clicked
  }

To upload an image and retrieve its source (URL), please follow these steps :

Select or Prepare Your Image: Begin by choosing the image you wish to upload, ensuring it’s in an appropriate format (e.g., JPG, PNG).

Step One : Insert an image block into your biography page.

Step Two: Select your desired image and proceed by clicking the “Submit” button.

Step Three: Now, open your image block, right-click on the image, and select “Copy Image Address.”

Step Four: Ensure that your image is not visible in the live view by disabling your status.

Here is an example of how you can use the image source (URL) in an HTML “img” tag:

    <img src="https://biz15.co/yourImage.jpg" alt="Description of the Image">

Replace ‘https://biz15.co/yourImage.jpg’ with the actual URL you received during the image upload process.

“Follow the previously mentioned steps to upload and obtain the image URL for all of your images.”
Other Style Sections :

Bio Link page, Grids, Learn, Sections

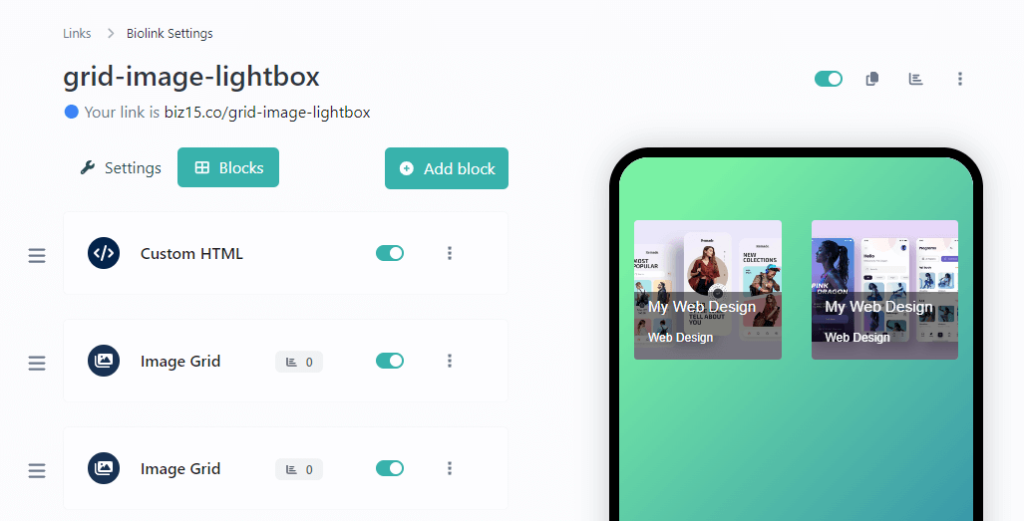
Create a Popup Effect for Grid Image on biopage

Step One: Insert a Custom HTML Block.

Step two: Just Paste below JS code into your Custom HTML block

  <script src="https://biz15.com/trialone/custom/js/biopage-grid-image-lightbox.js"></script>

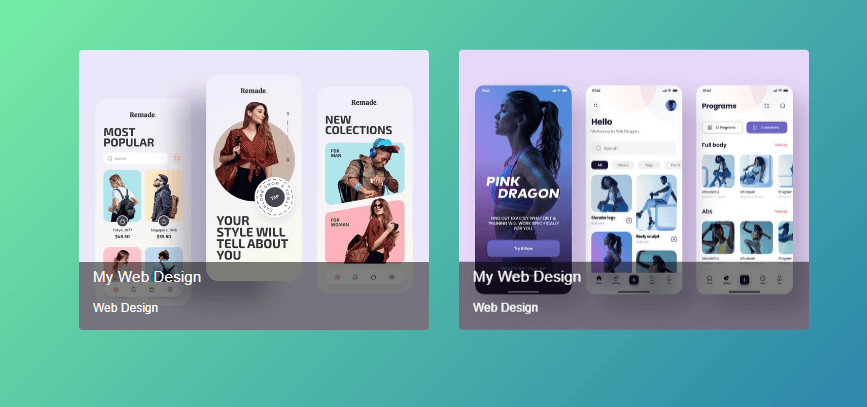
The result following the completion of the steps.

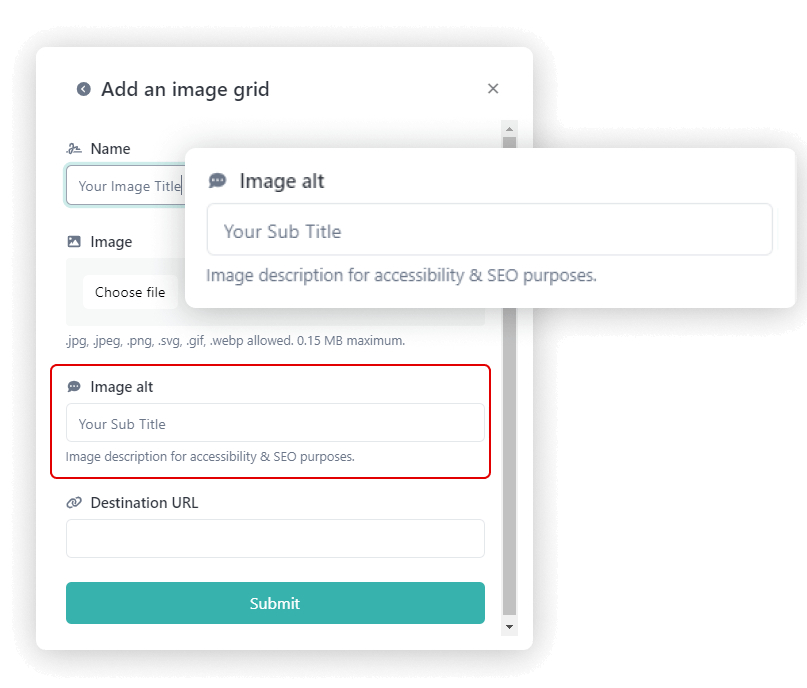
Title and Subtitle (description)

Create A Stunning Web Pages

Create A Stunning Web Pages

How to Upload Image

The following figure shows how to Upload Image

The following figure shows which field you must leave

Other Style Sections :