
To integrate this Collage Section – 001into your biography page, please follow these installation instructions.
Step One: Insert a Custom HTML Block.
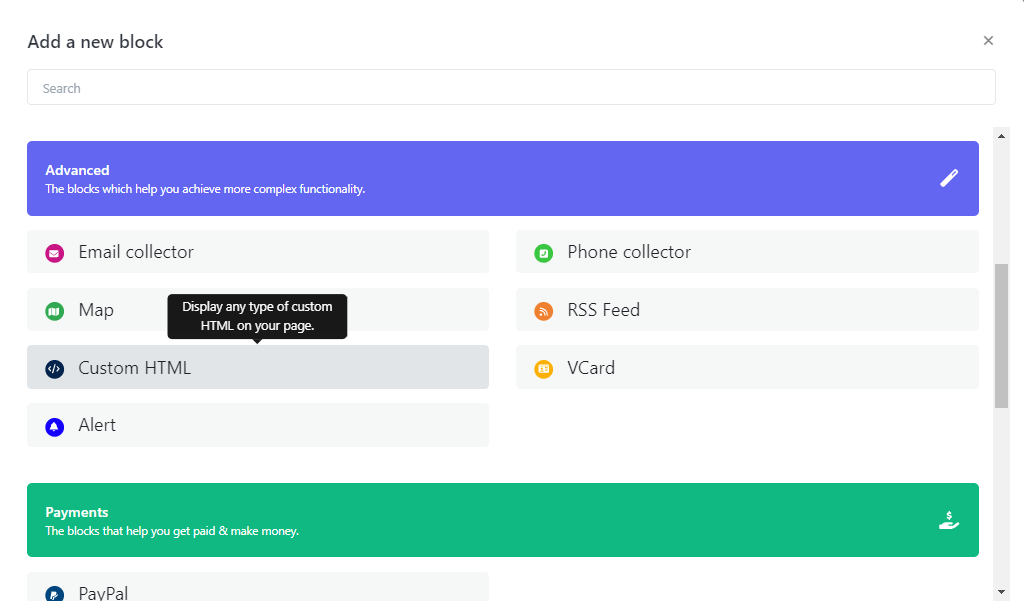
Step two: Just Paste below JS code into your Custom HTML block
      <!-- Include the JavaScript file for the CollageSection001 component -->
      <script src="https://biz15.com/trialone/custom/js/collagesection001.js"></script>

      <script>
          // Create a new instance of the CollageSection001 component
          new CollageSection001(
          {
              // Set the subtitle for the collage section
              subTitle: "Summer collection",

              // Set the main title for the collage section
              title: "TRENDY AND CLUSSI FOR NEW SEASON",

              // Provide a description for the collage section
              description: "I'm very much of the 'buy better' persuasion but never really knew where to look.",

              // Specify the date for the collage section (currently placeholder values)
              date: "00 / 00 / 0000",

              // Set the link for the button in the collage section
              btnLink: "https://example.com/",

              // Specify the URL for the image in the top-left position of the collage
              leftTopImg: "https://biz15.co/uploads/files/841f9e410b39fdcf5dd4007184cc6429.jpg",

              // Specify the URL for the image in the bottom-left position of the collage
              leftBottomImg: "https://biz15.co/uploads/files/73aab86b868ed854ee349204a9504c2f.jpg",

              // Specify the URL for the image in the center position of the collage
              centerImg: "https://biz15.co/uploads/files/cddfa7af68648a2e7395b686ab6c06d6.jpg",

              // Specify the URL for the image in the top-right position of the collage
              rightTopImg: "https://biz15.co/uploads/files/04fbb3c8976b268cd95ac57afb3af22a.jpg",

              // Specify the URL for the image in the bottom-right position of the collage
              rightBottomImg: "https://biz15.co/uploads/files/2fc4ff310e1665c85291a5052636d0e0.jpg",
          });
      </script>
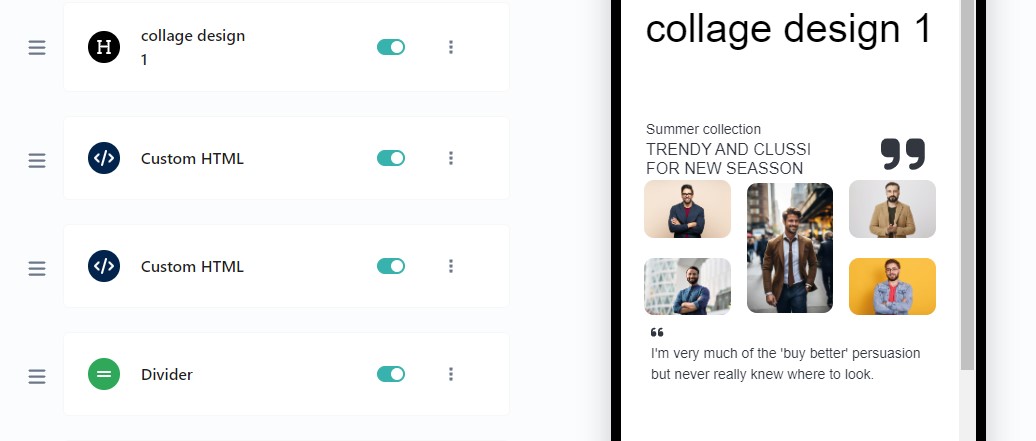
The result following the completion of the steps.
Where To Set Images
Below code for Where To Set Images :
 {
// Specify the URL for the image in the top-left position of the collage
leftTopImg: "yourimage.jpg",

// Specify the URL for the image in the bottom-left position of the collage
leftBottomImg: "yourimage.jpg",

// Specify the URL for the image in the center position of the collage
centerImg: "yourimage.jpg",

// Specify the URL for the image in the top-right position of the collage
rightTopImg: "yourimage.jpg",

// Specify the URL for the image in the bottom-right position of the collage
rightBottomImg: "yourimage.jpg",
 }
Where To Set Title And Description
Below code for Where To Set Title And Description :
{
// Set the subtitle for the collage section
subTitle: "Your Sub Title",

// Set the main title for the collage section
title: "Your Title",

// Provide a description for the collage section
description: "Your Description",
}

Where To Set Date
Below code for Where To Set Date :
{
// Specify the date for the collage section (currently placeholder values)
date: "00 / 00 / 0000",
}

Where To Set Button Link
Below code for Where To Set Button Link :
{
// Set the link for the button in the collage section
btnLink: "https://example.com/",
}

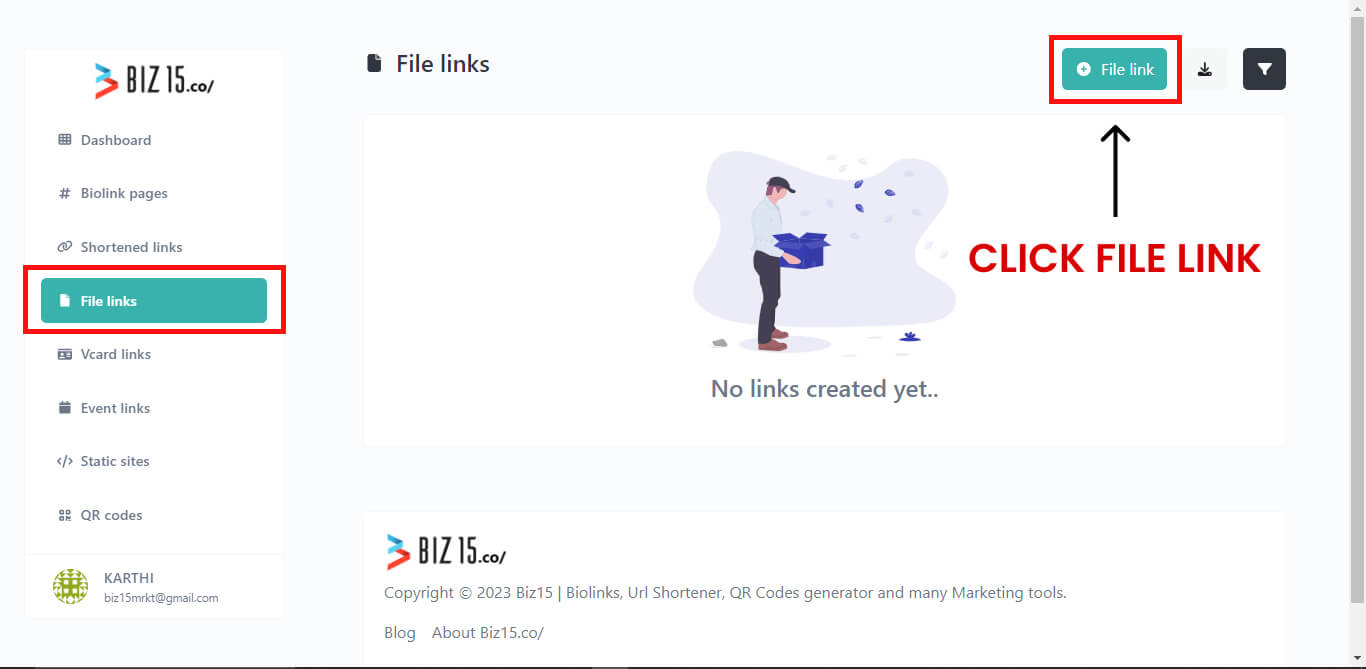
To upload an image and retrieve its source (URL), please follow these steps :
Select or Prepare Your Image: Begin by choosing the image you wish to upload, ensuring it’s in an appropriate format (e.g., JPG, PNG).
Step One : on Your Dashboard Select “File Link” panel and click “File link” button on your Top Right corner
Step Two: Select your desired image and and its name then proceed by clicking the “Create File Url” button.
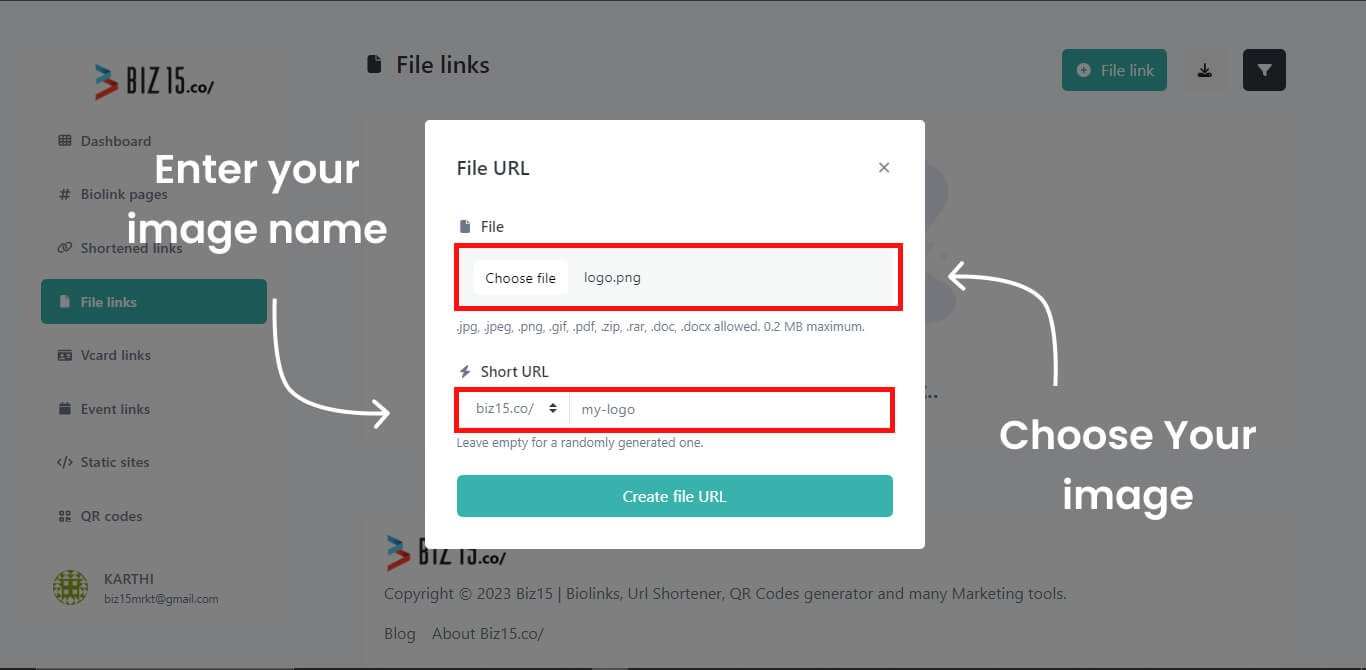
Step Three: Now, you can see bellow figure that highlighted the image url and just “Copy Your Image Address.”
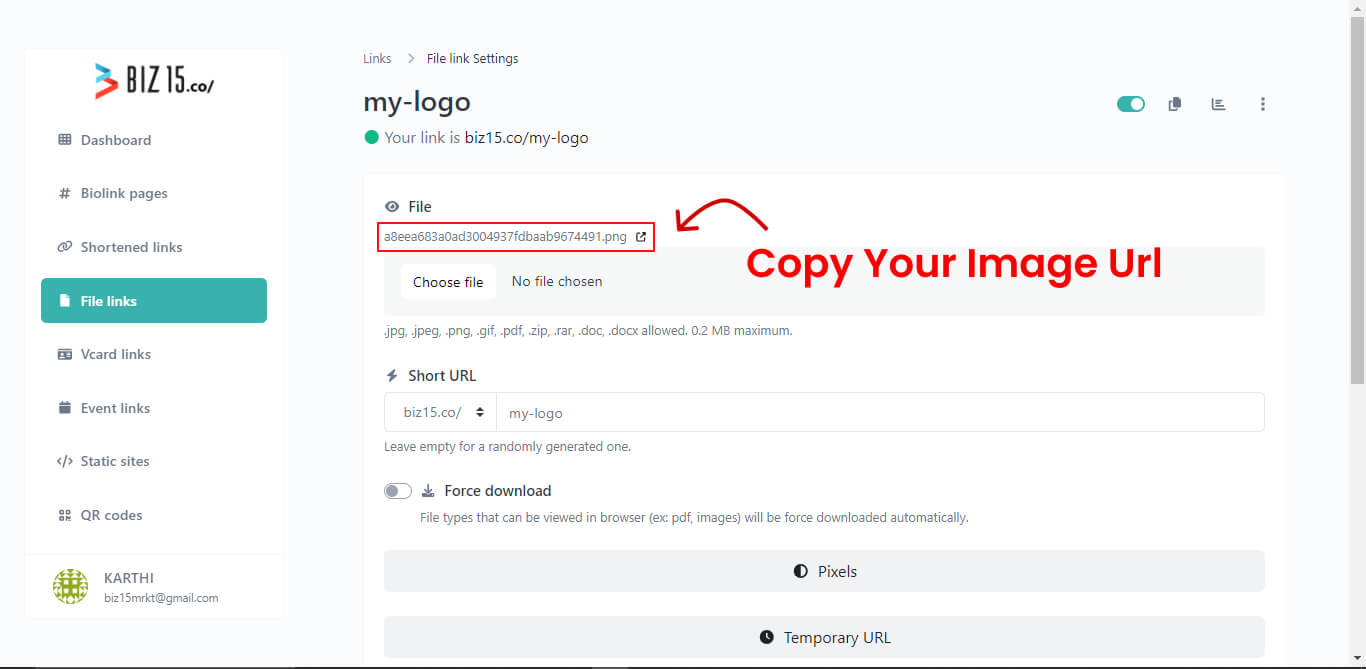
“Follow the previously mentioned steps to upload and obtain the image URL for all of your images.”